Sign Up and Add Your First Email Account
This guide walks you through signing up for AutoPrintEmail and connecting your first email account. The whole process takes about 2 minutes.
Table of Contents
- Download and Install
- Sign Up
- Start Your Free Trial
- Add Your First Email Account
- Select Mailboxes
- Configure Print Mode
- Select Rules
- Select a Printer & Configure Print Options
- Configure Print Options
- Approve Setup
- You're All Set!
- Next Steps
Download and Install
First, download AutoPrintEmail for your operating system from our download page.
- Windows: Get it from the Microsoft Store (recommended) or download the .exe installer
- macOS: Download the .dmg file and drag AutoPrintEmail to your Applications folder
Launch the app after installation.
Sign Up
When you first open AutoPrintEmail, you'll see the welcome screen.
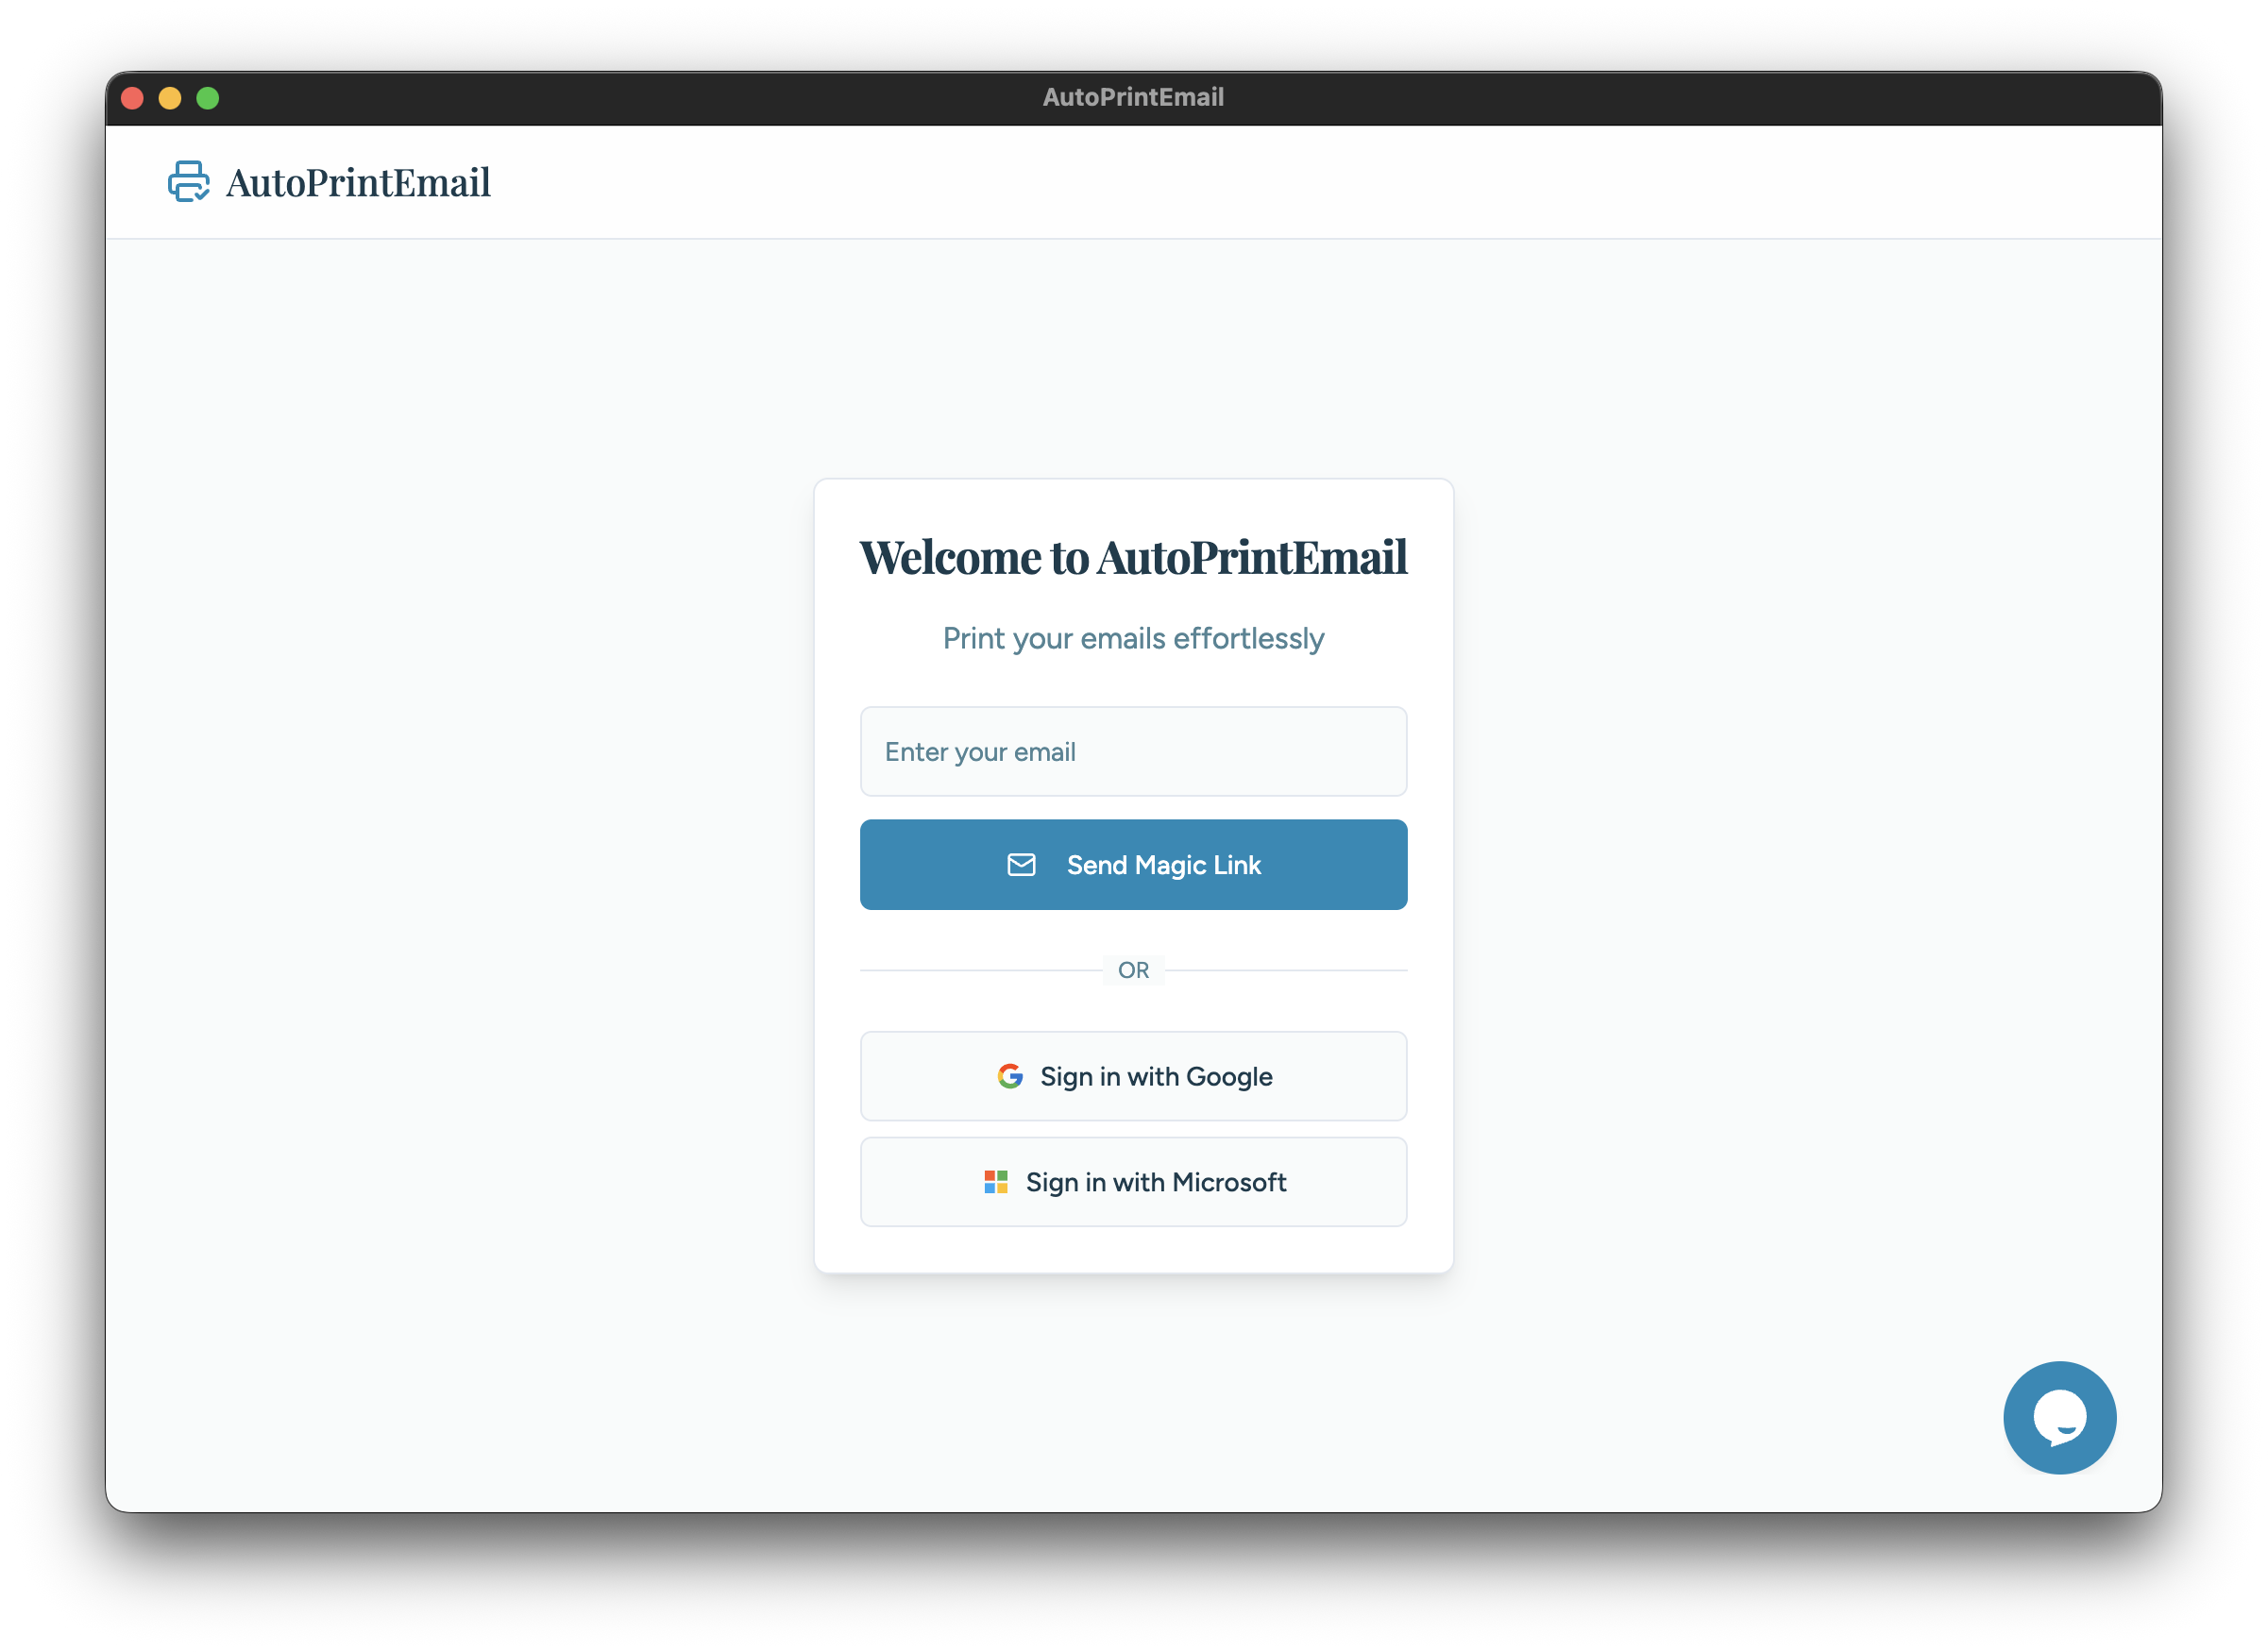
You can sign up using:
- Email - Enter your email and we'll send you a magic link (no password needed)
- Google - Sign in with your Google account
- Microsoft - Sign in with your Microsoft account
Click your preferred option and follow the prompts. If you chose email, check your inbox for the magic link and click it to complete sign up.
Start Your Free Trial
After signing up, you'll see the trial screen.

Click Start free trial to begin your 3-day trial. No credit card required.
Add Your First Email Account
Now you're ready to connect an email account. Select your email provider:
Gmail
- Select Gmail from the provider list
- Click Connect with Google
- Sign in to your Google account and grant AutoPrintEmail permission to read your emails
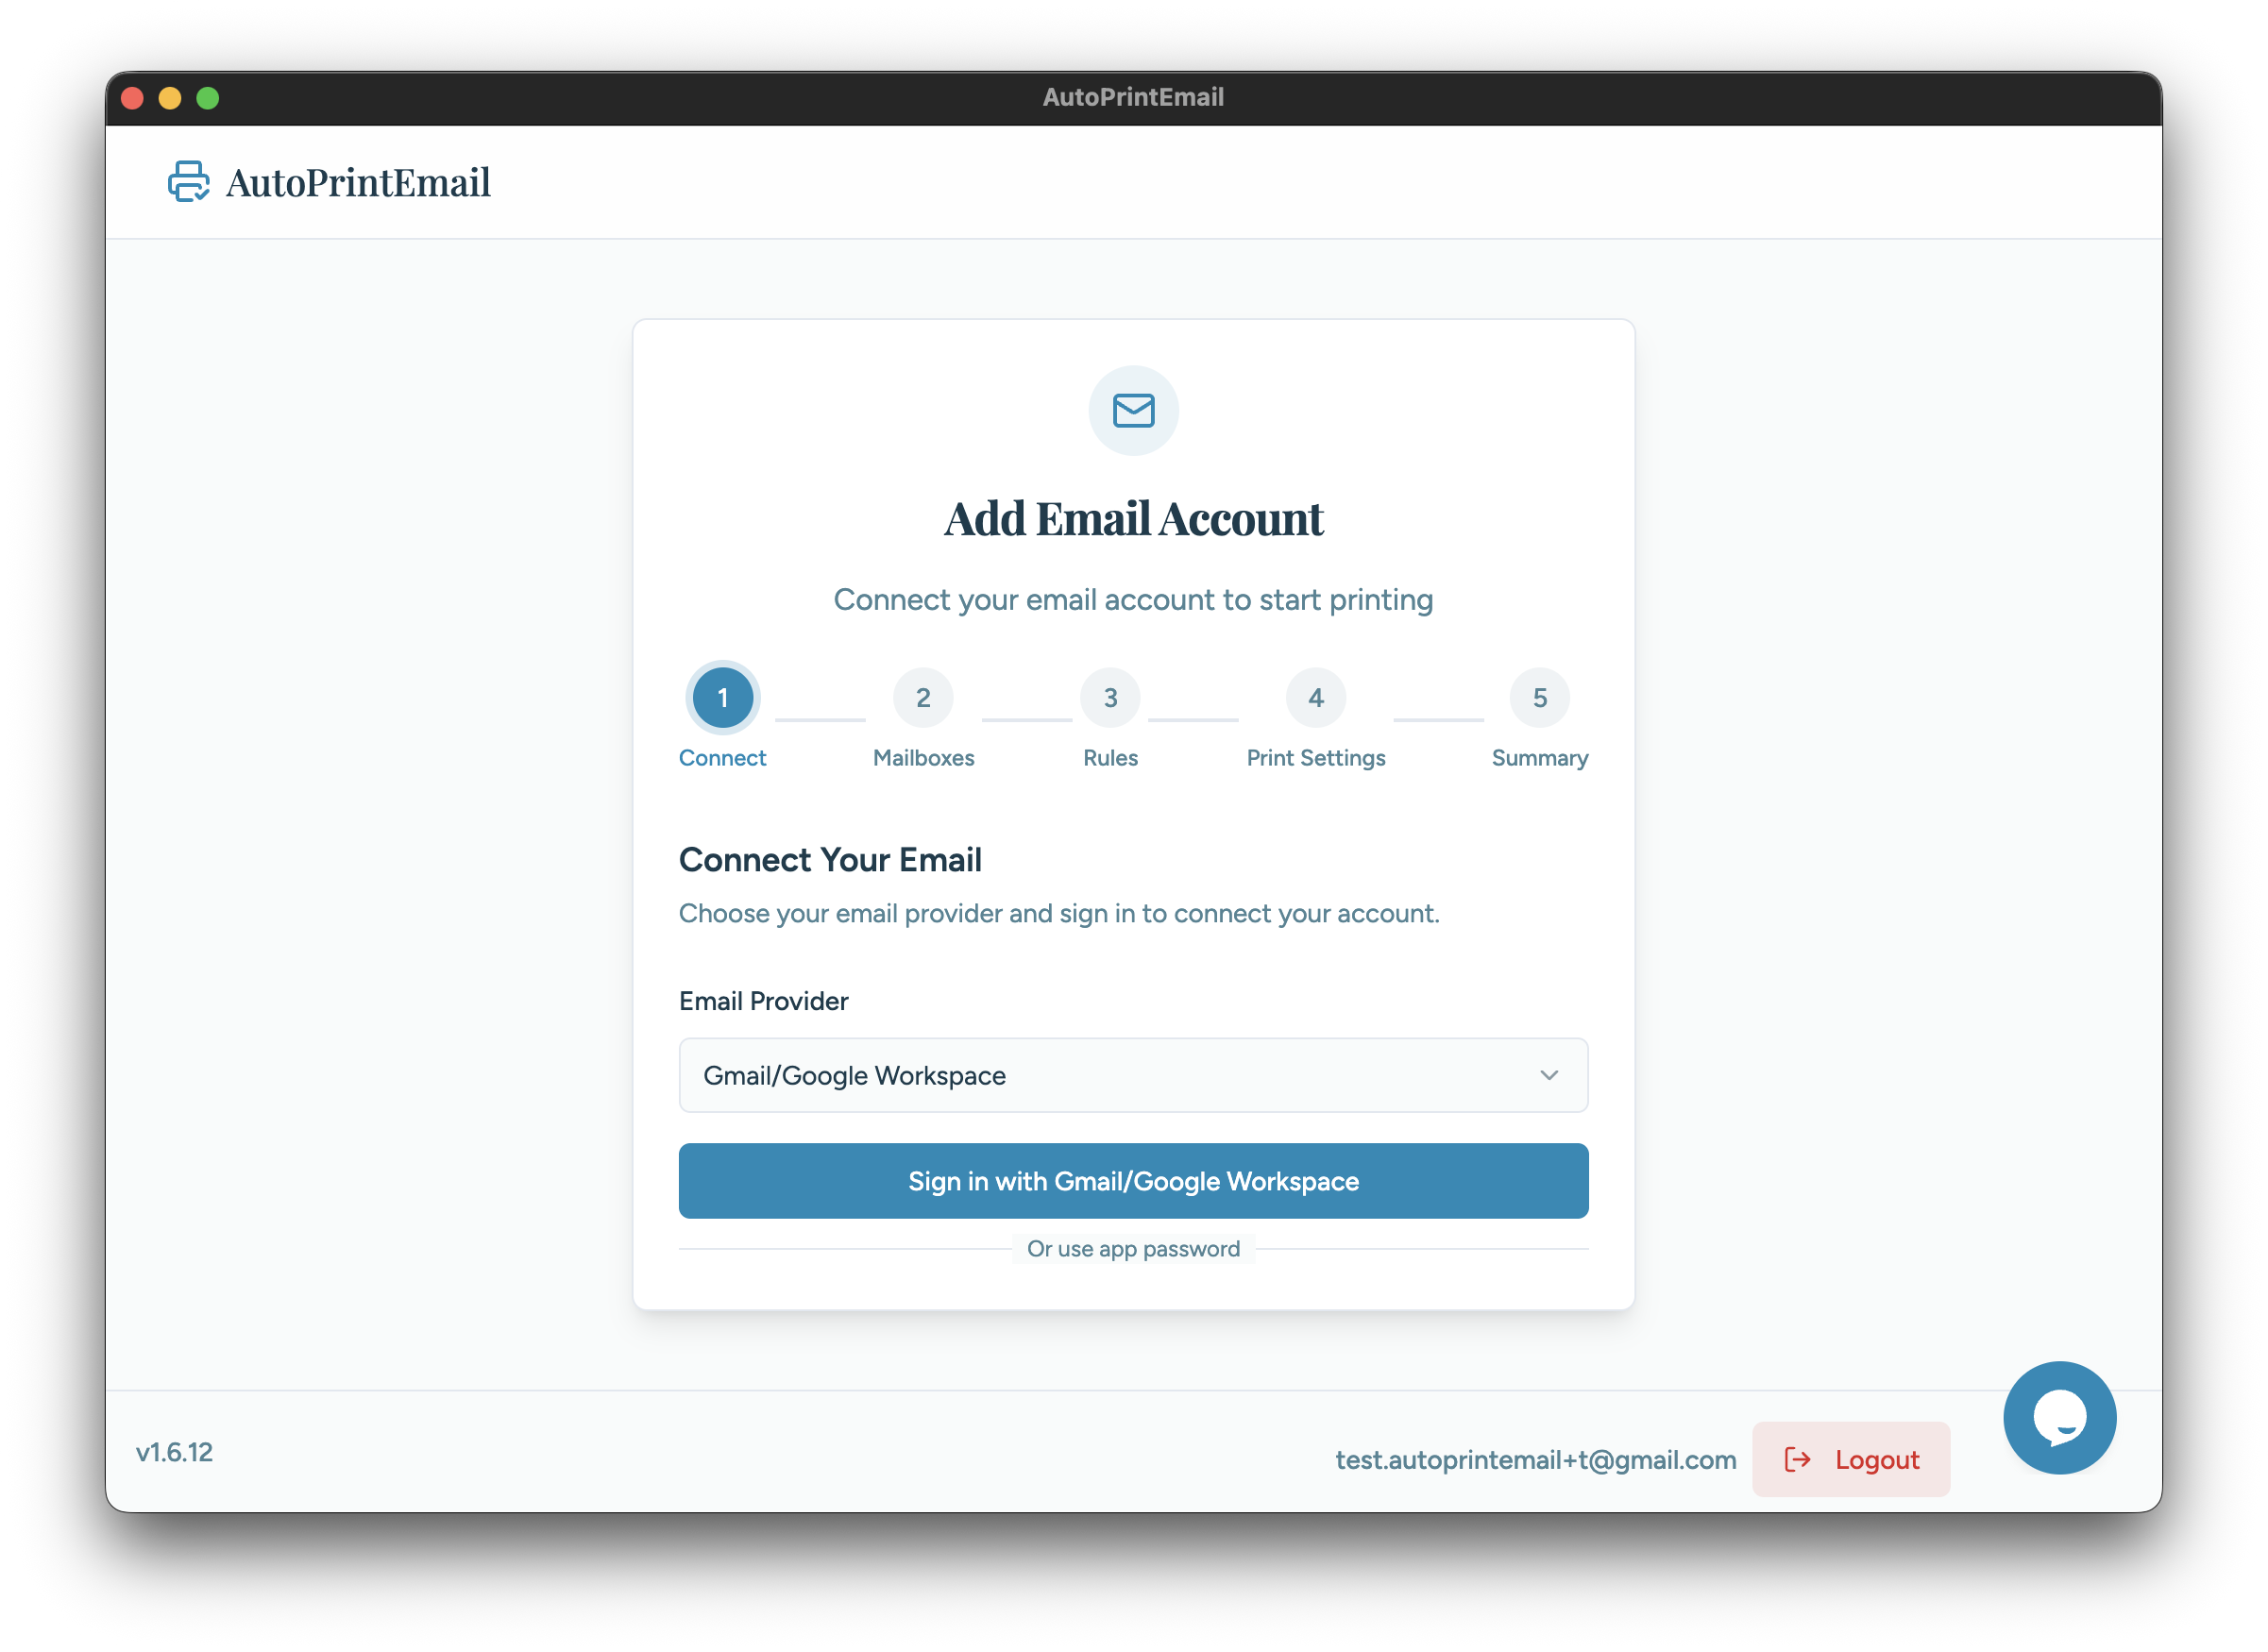
After authorizing, you'll be redirected back to the app.
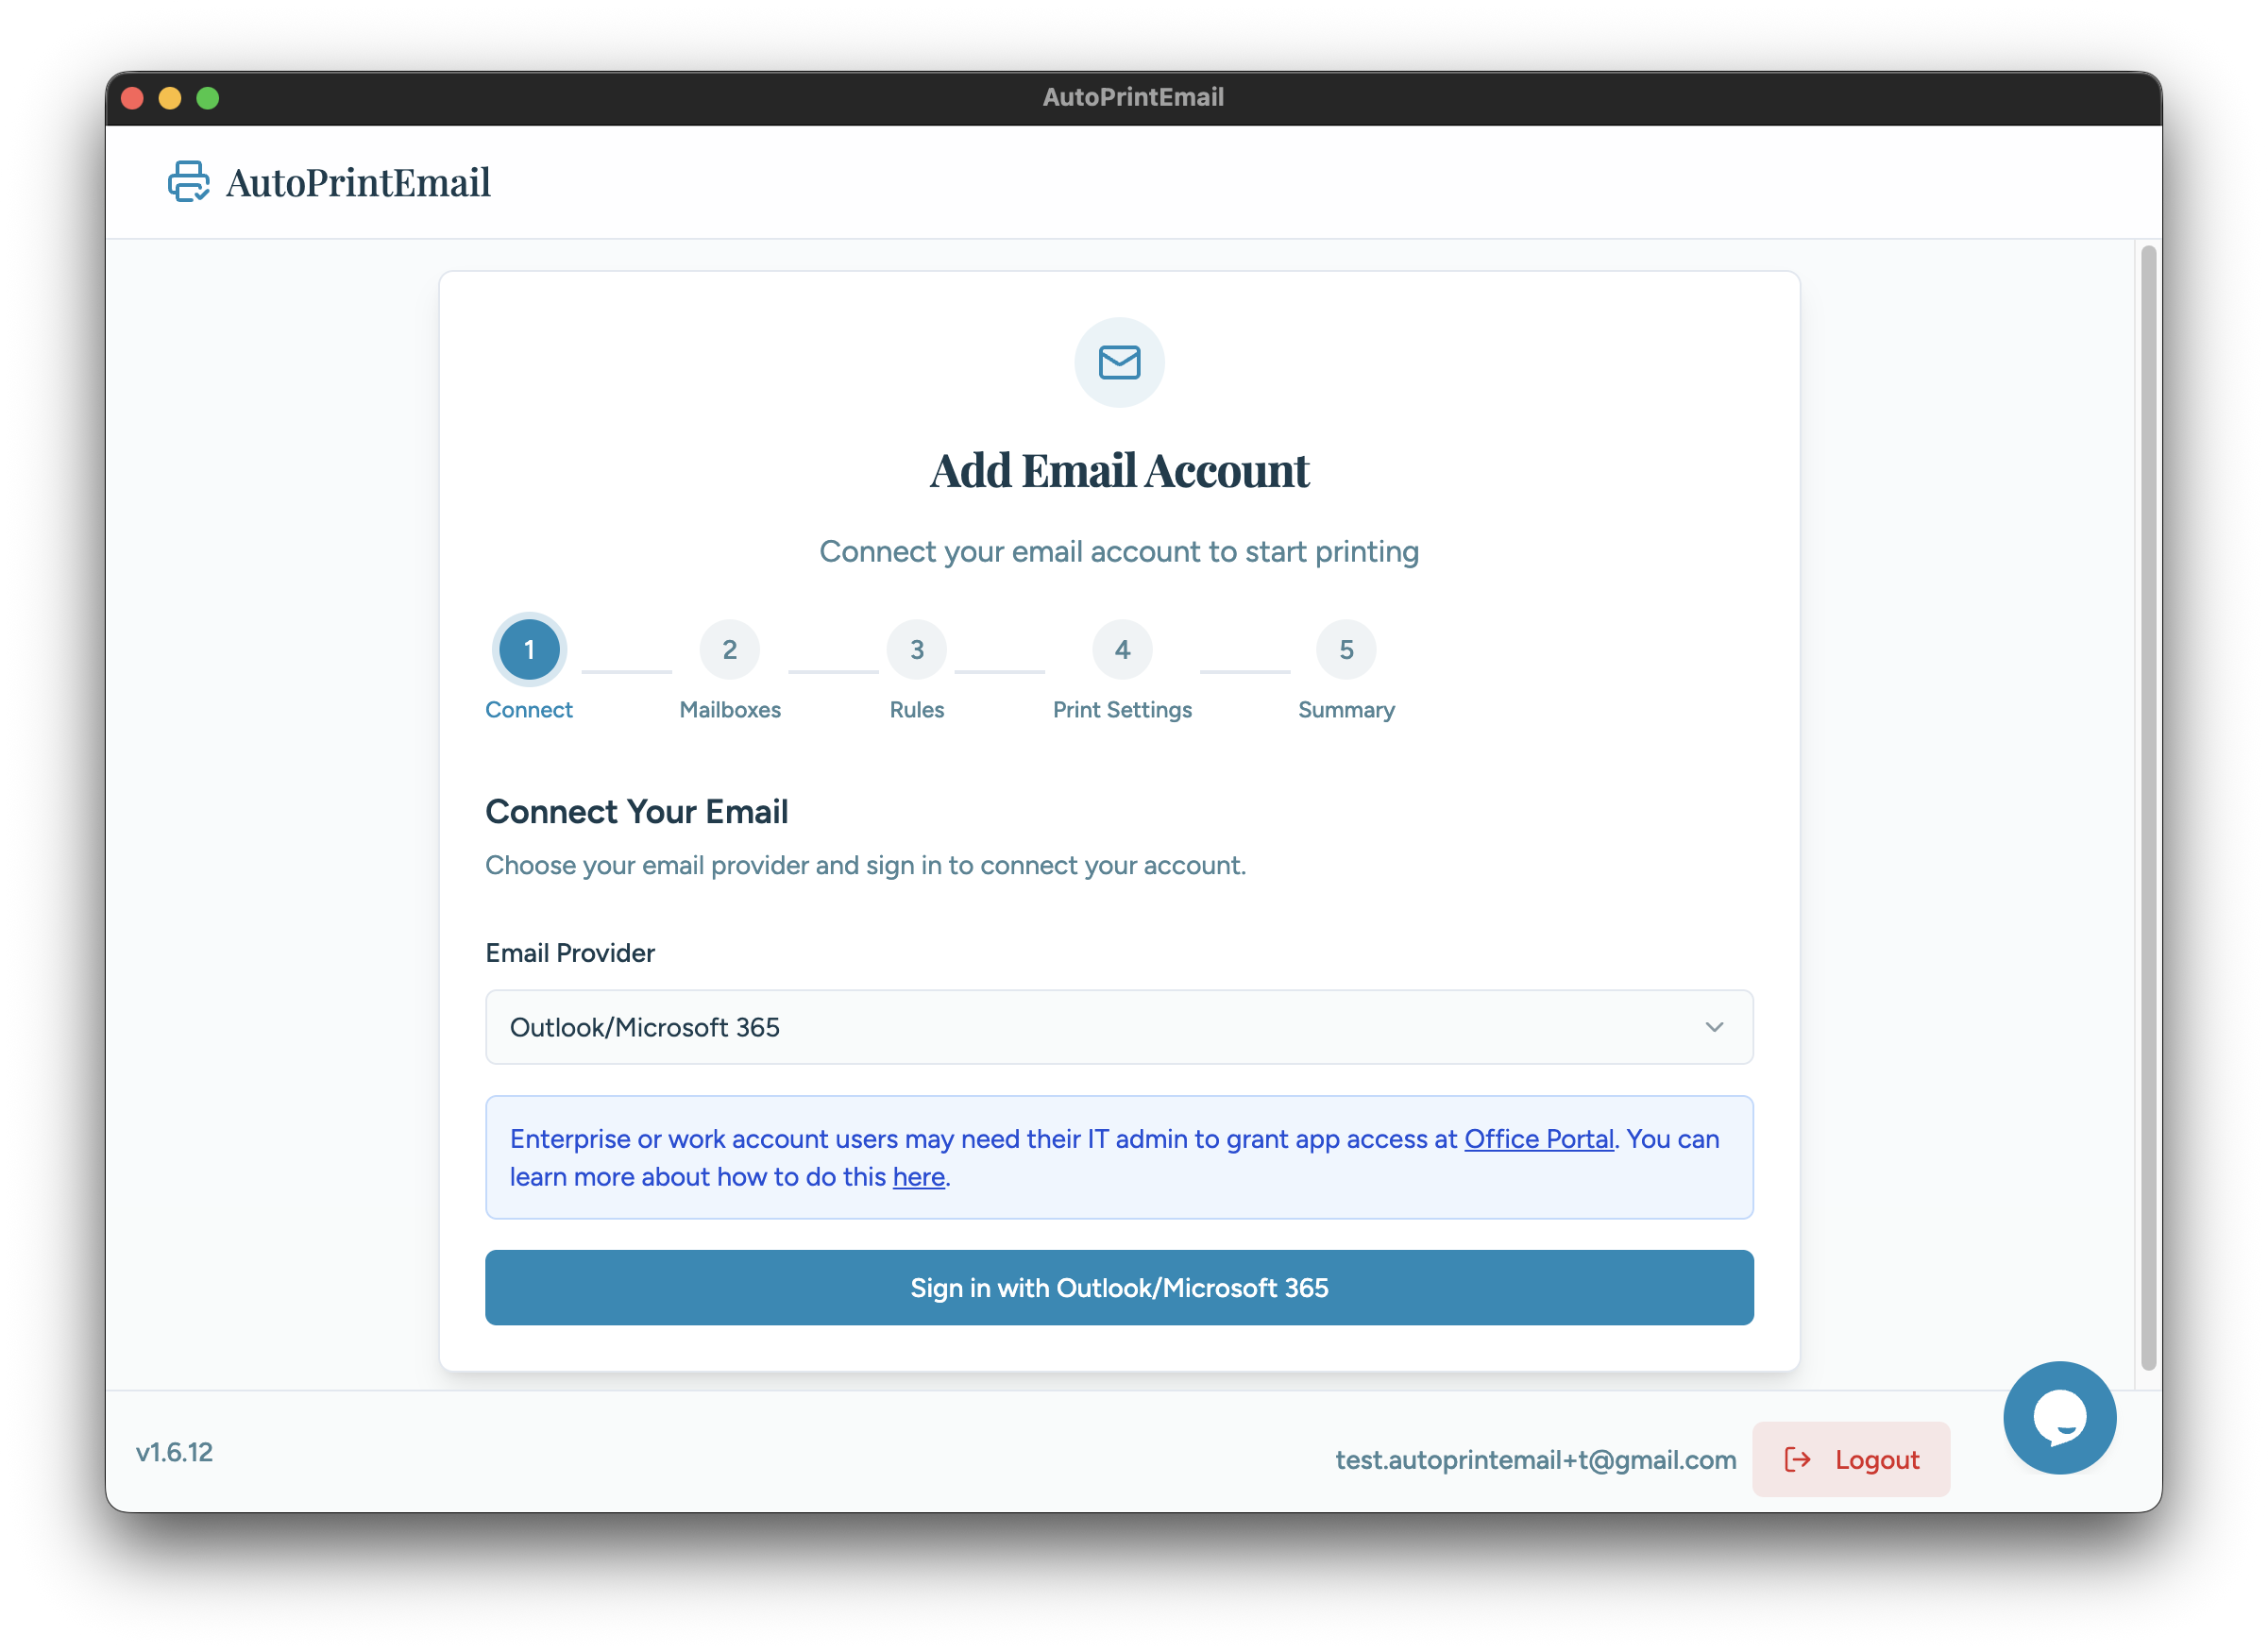
Outlook / Microsoft 365
- Select Outlook from the provider list
- Click Connect with Microsoft
- Sign in to your Microsoft account and grant permissions
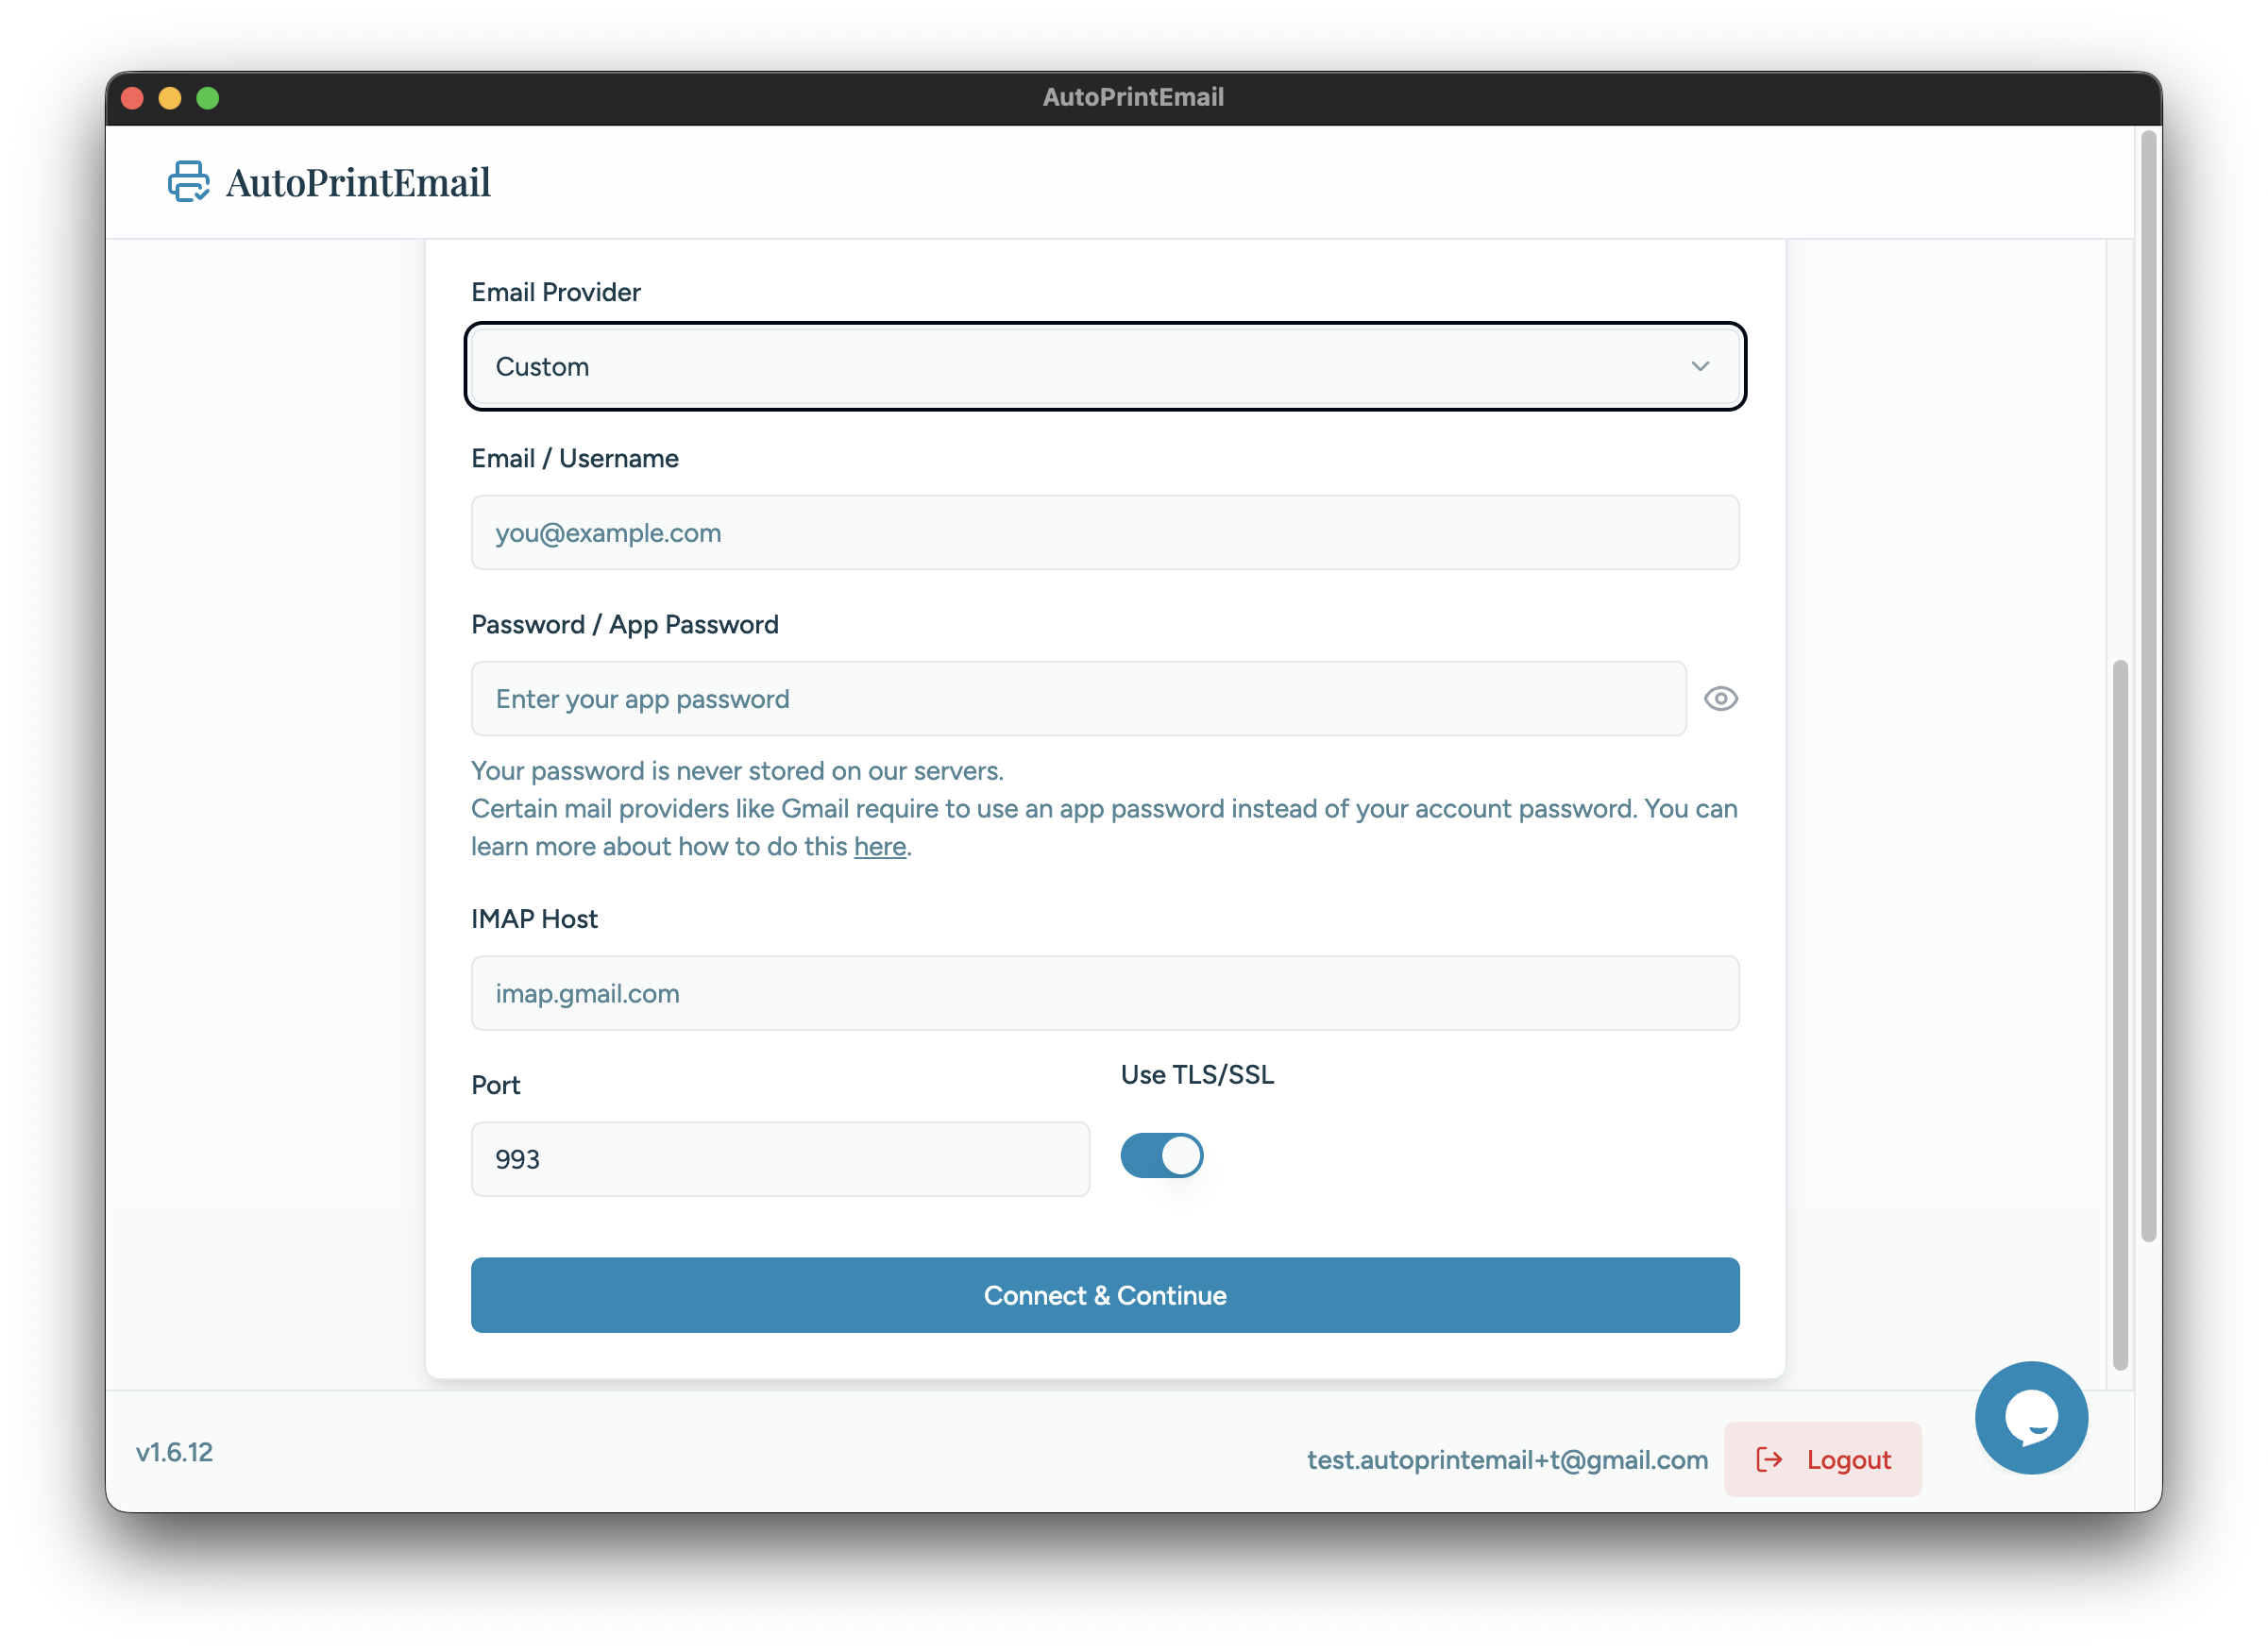
IMAP (Other Email Providers)
For other email providers (Yahoo, custom domains, etc.):
- Select IMAP from the provider list
- Enter your email address
- Enter your IMAP server settings (usually auto-detected)
- Enter your password or app-specific password
Select Mailboxes
After connecting your email account, choose which mailboxes (folders) to monitor for new emails.
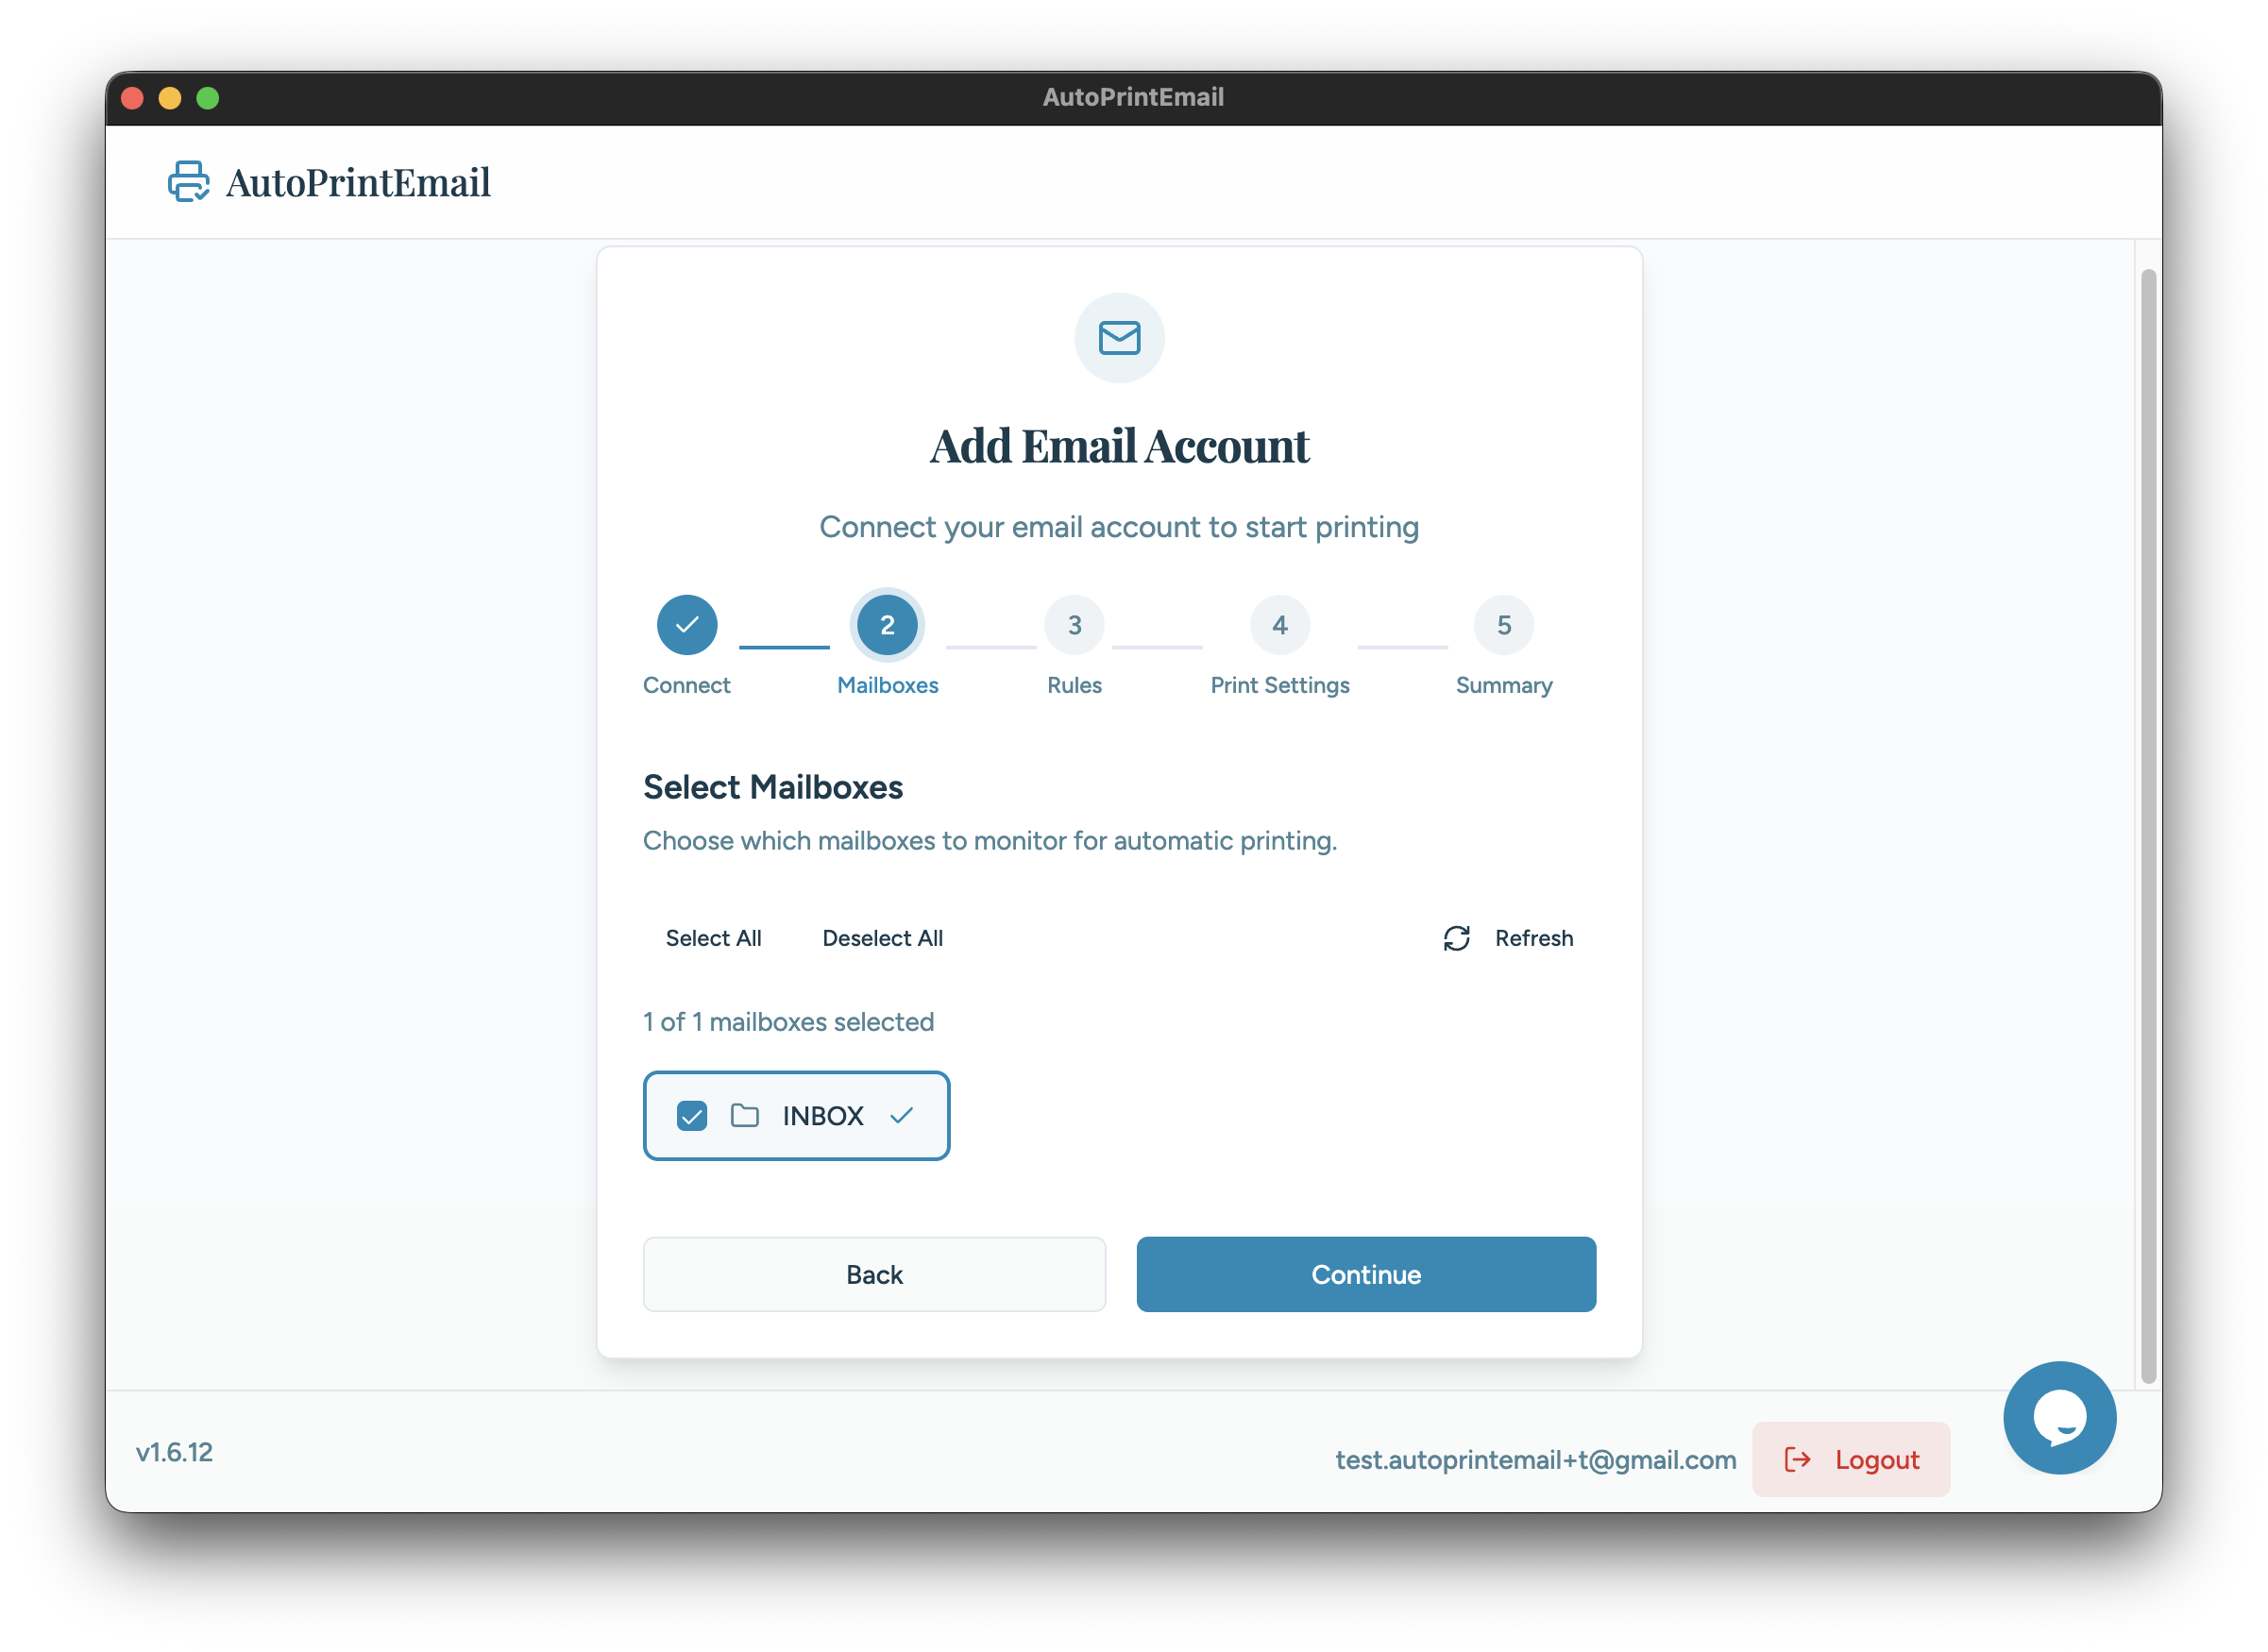
By default, Inbox is selected. You can also monitor other folders like:
- Sent - Print copies of emails you send
- Custom folders - Any labels or folders you've created
Check the boxes for each mailbox you want AutoPrintEmail to watch.
Configure Print Mode
Next, configure which emails should be processed based on date and read status.
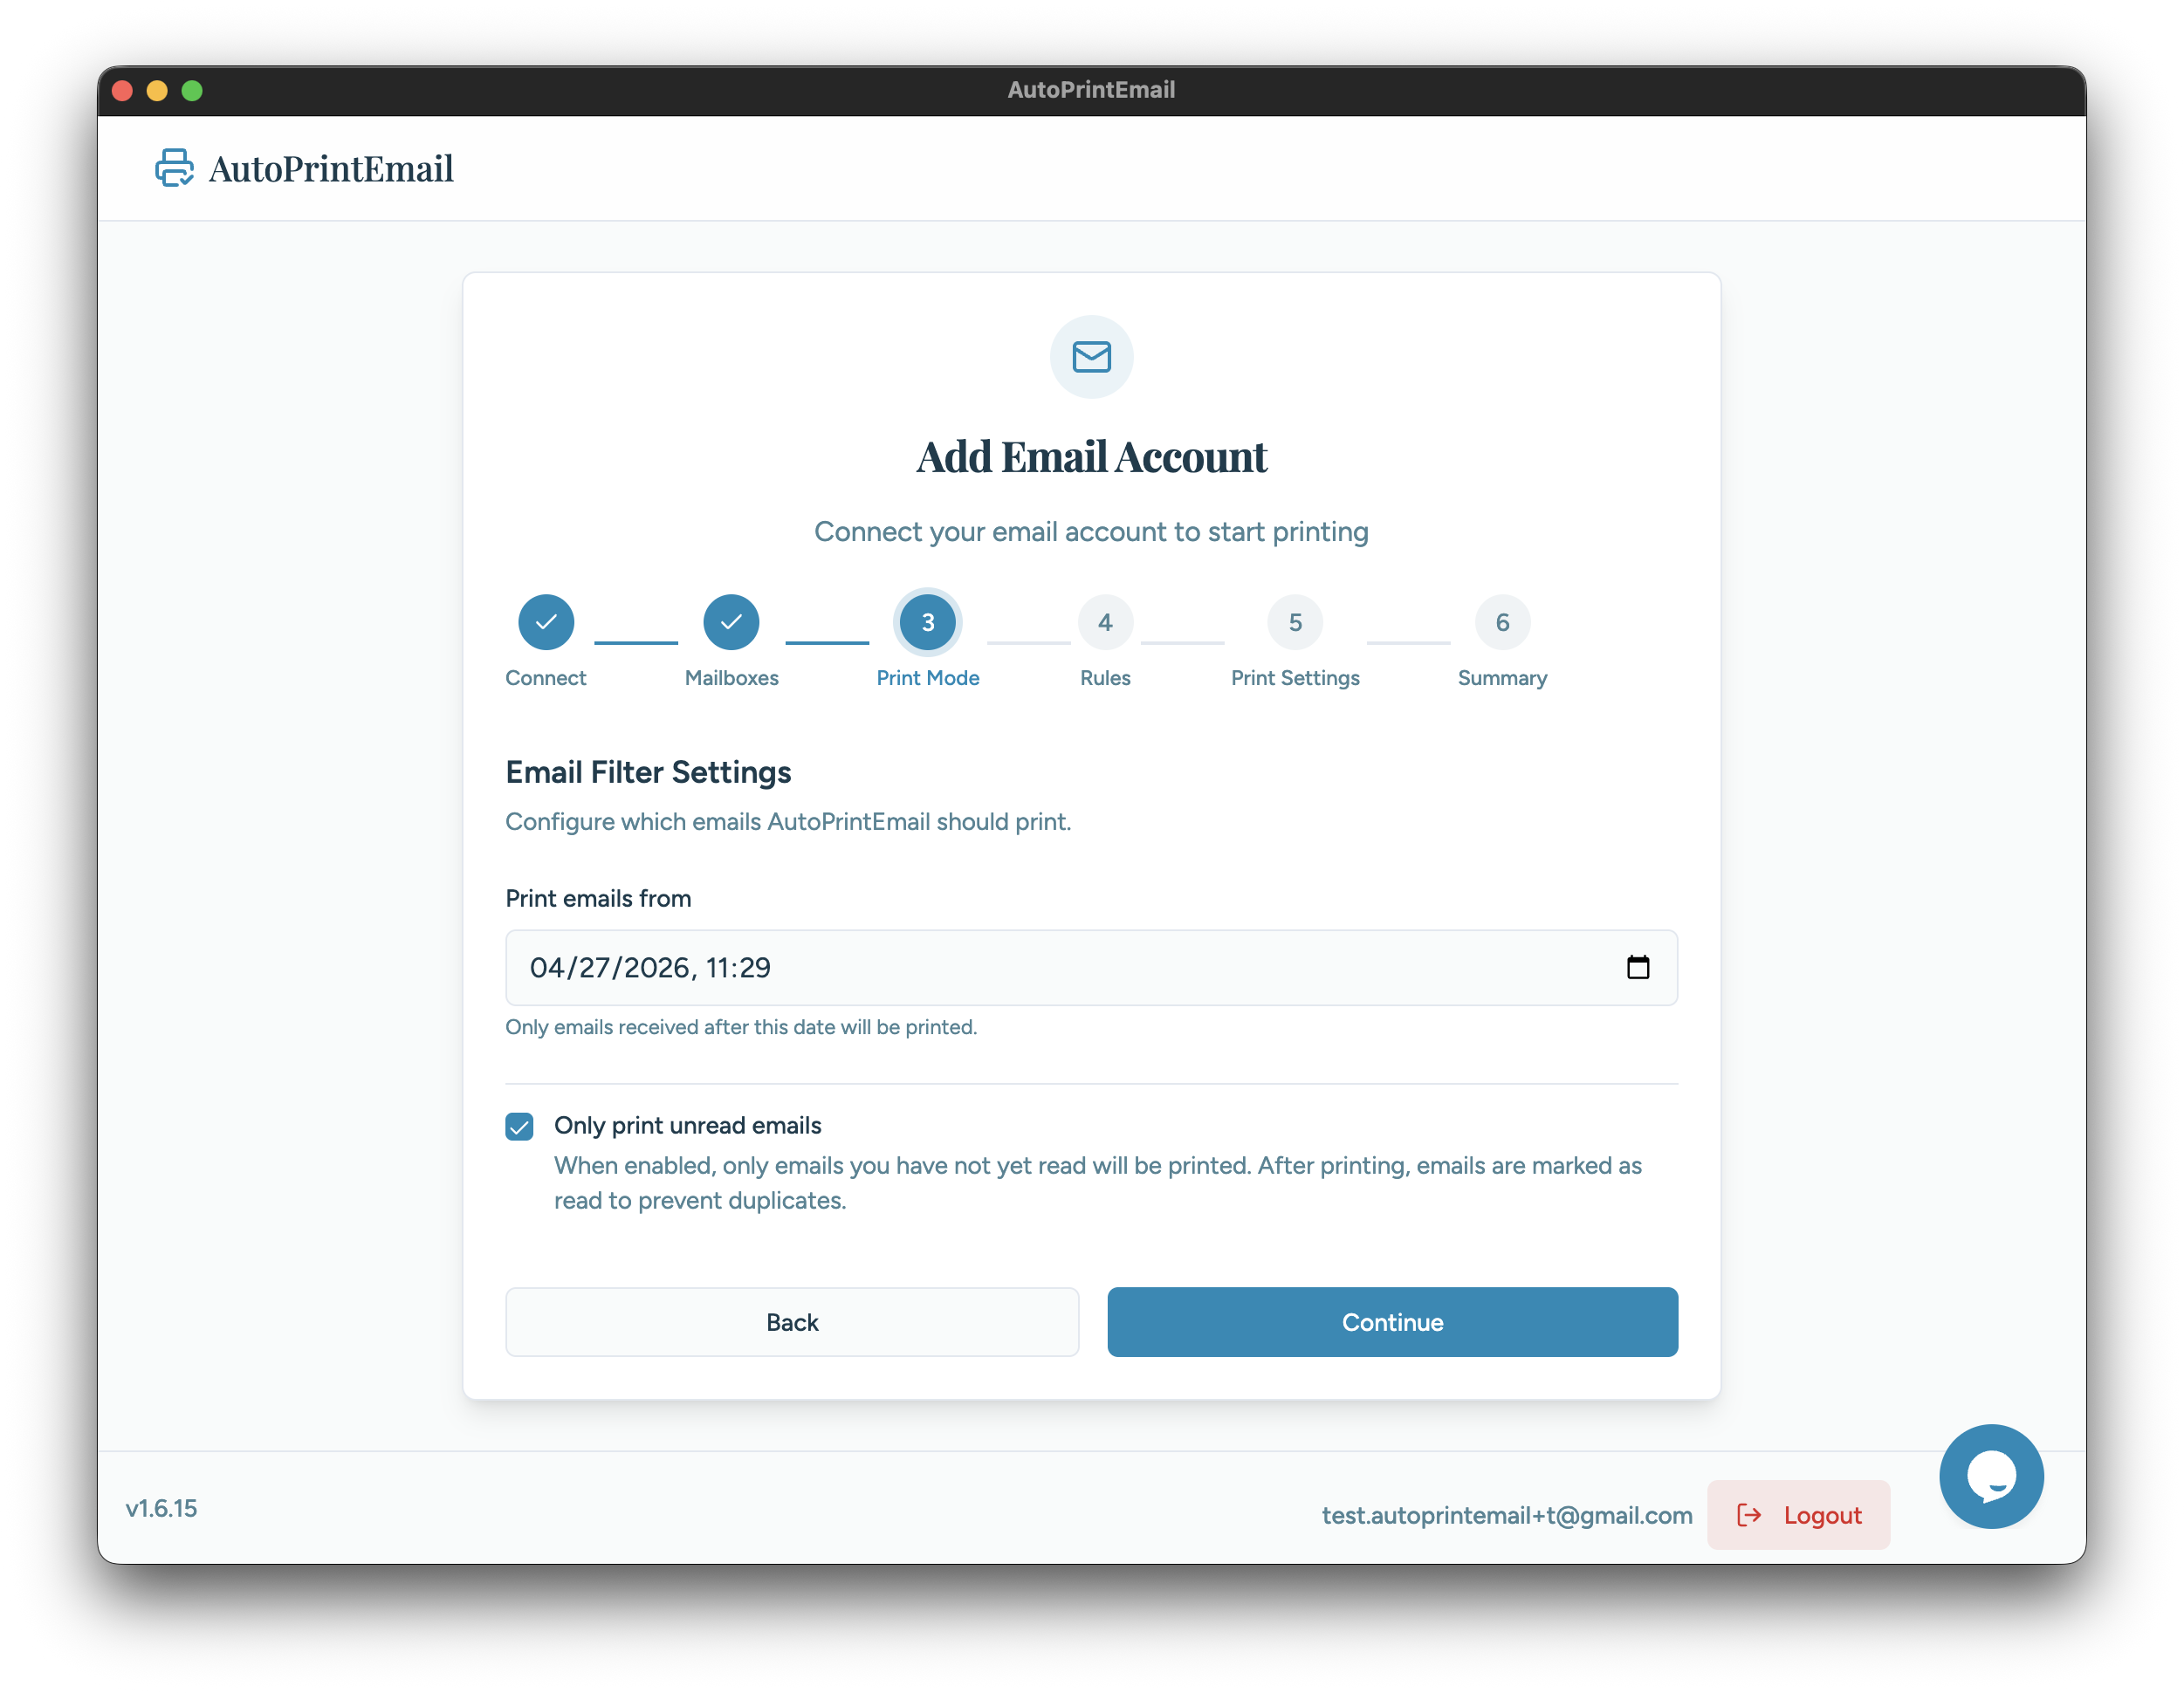
You have two settings:
- Print emails from — Pick a start date. Only emails received after this date will be printed. This prevents old emails from piling up in your print queue.
- Only print unread emails — Toggle this on to skip emails you've already read. Turn it off if you want to print all emails regardless of read status (the app uses local tracking to avoid duplicates).
Select Rules
Decide which emails should be printed automatically.
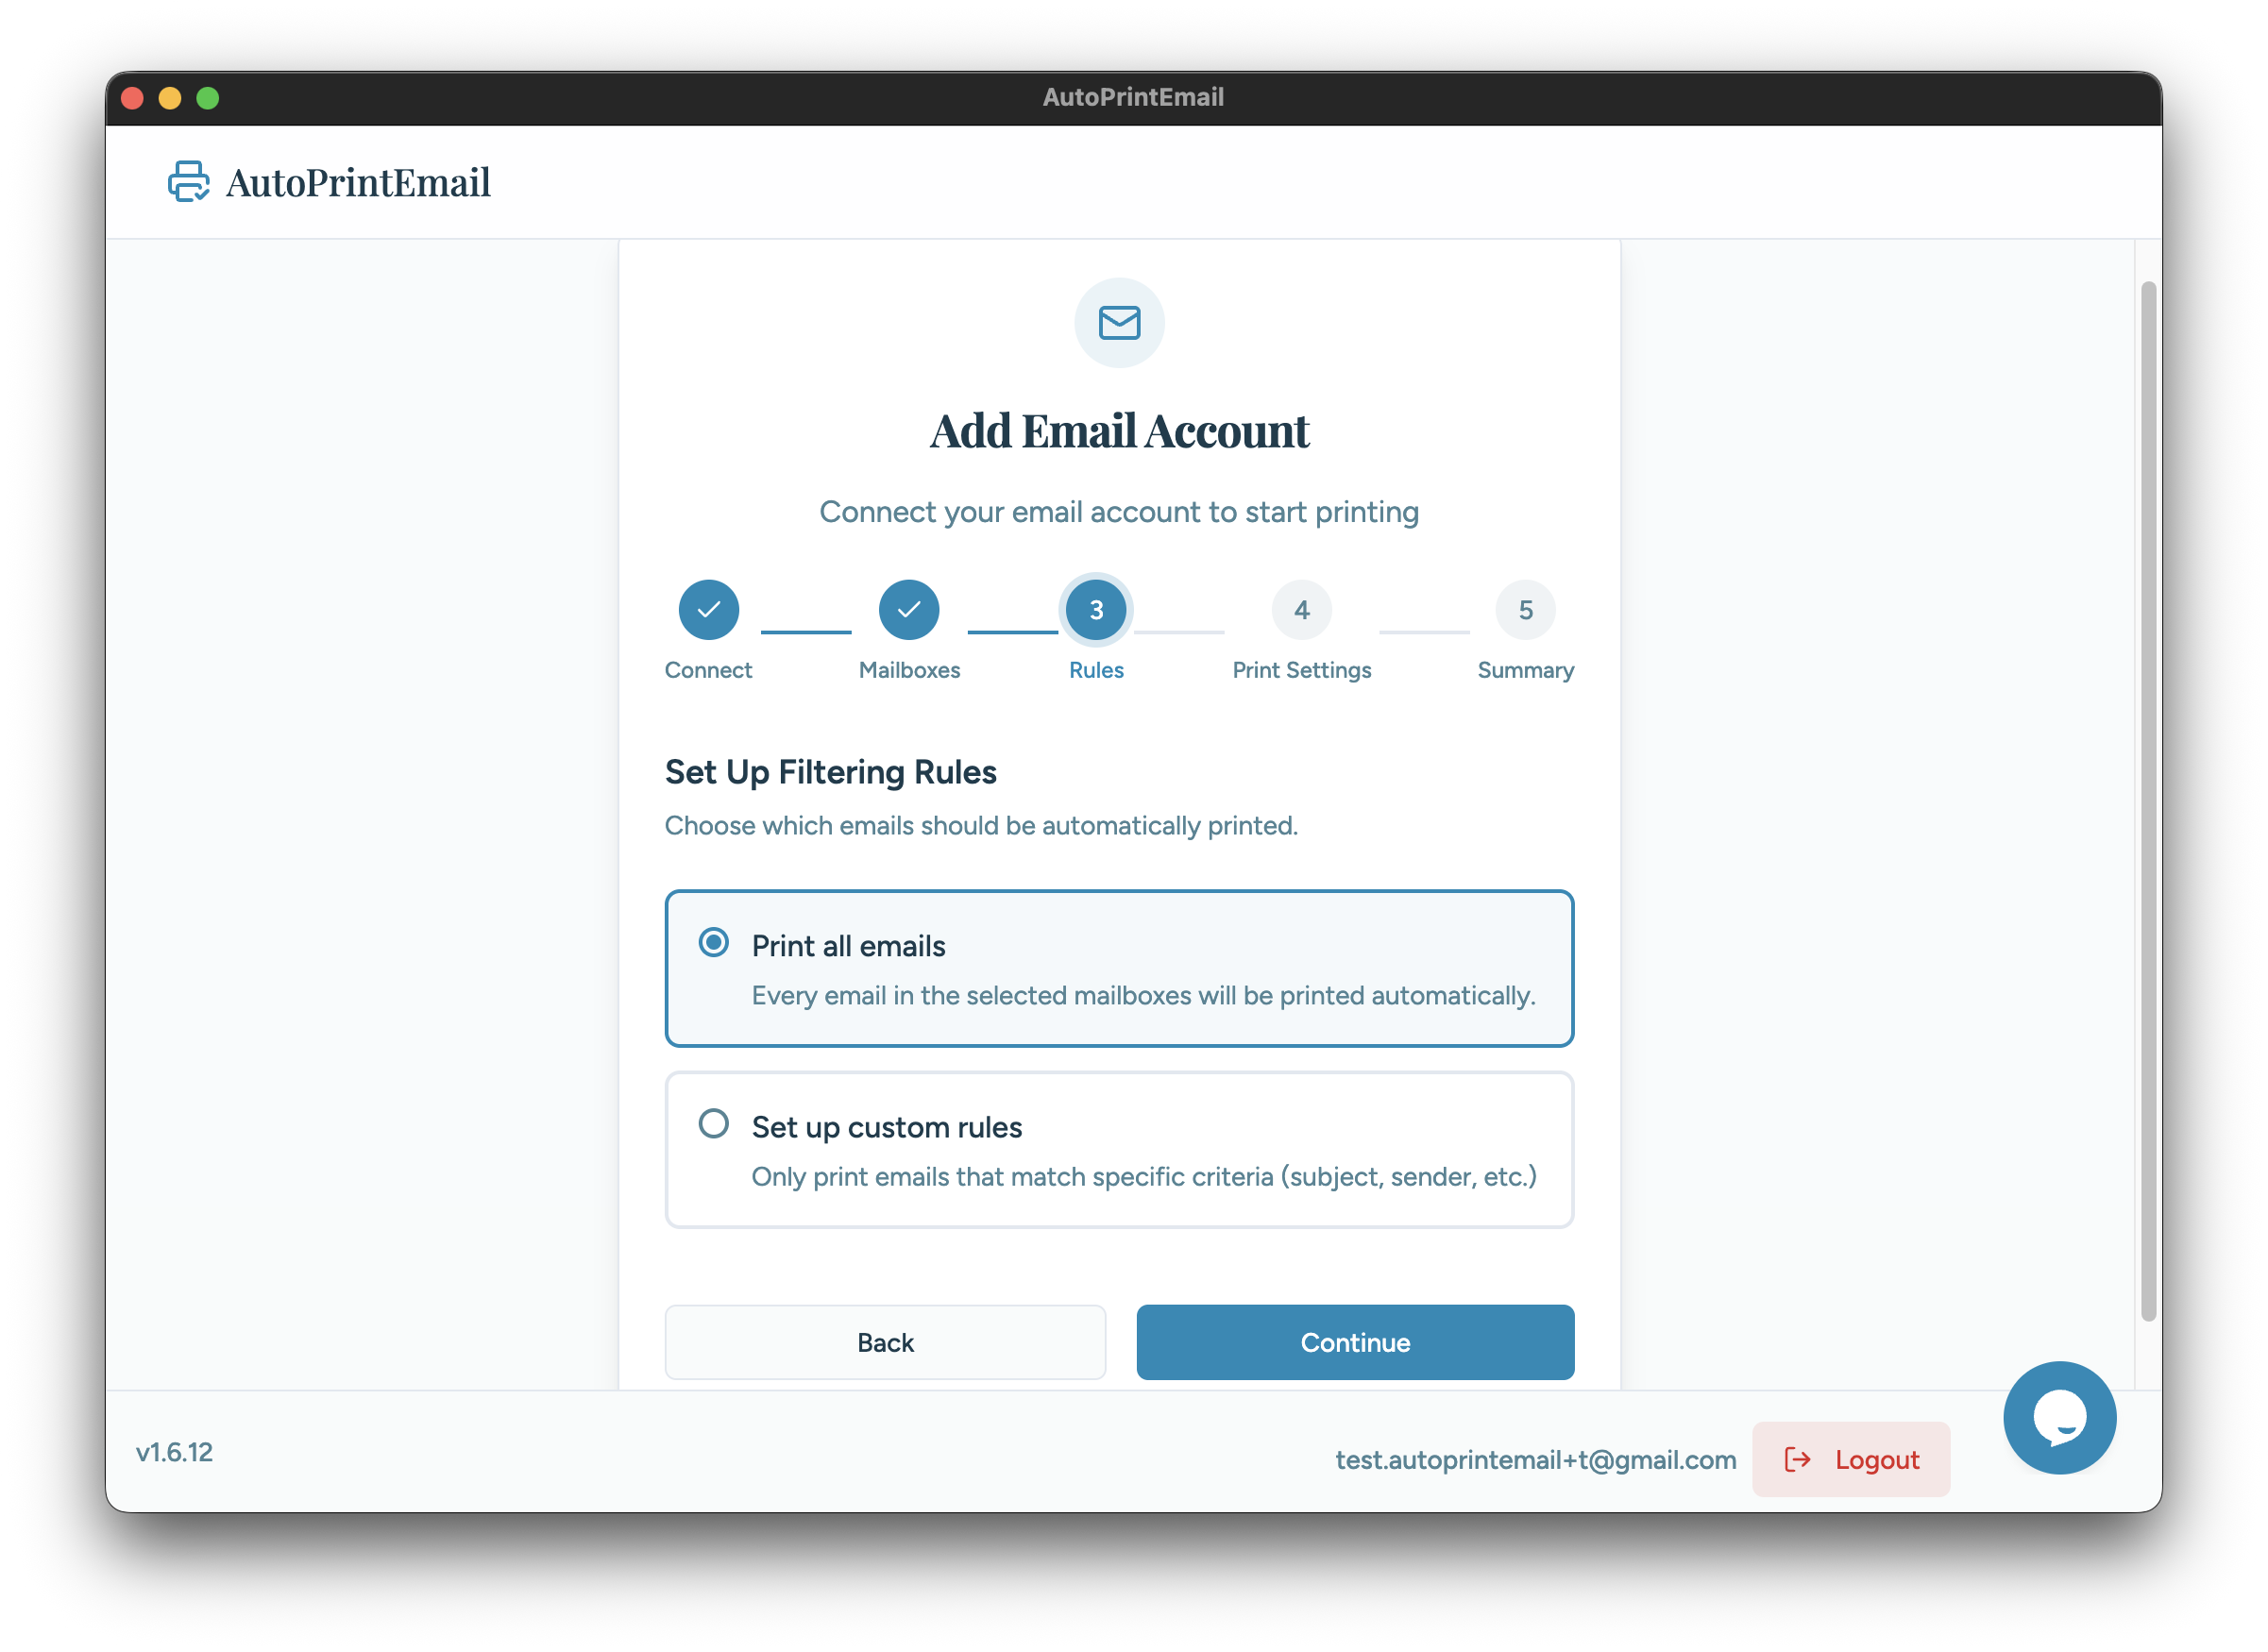
You have two options:
- Print all emails - Every new unread email in your selected mailboxes will print
- Use rules - Only print emails matching specific criteria (sender, subject, etc.)
Don't worry — you can always configure or change these rules later from the account settings.
Select a Printer & Configure Print Options
After connecting your email, you'll be prompted to select a printer.
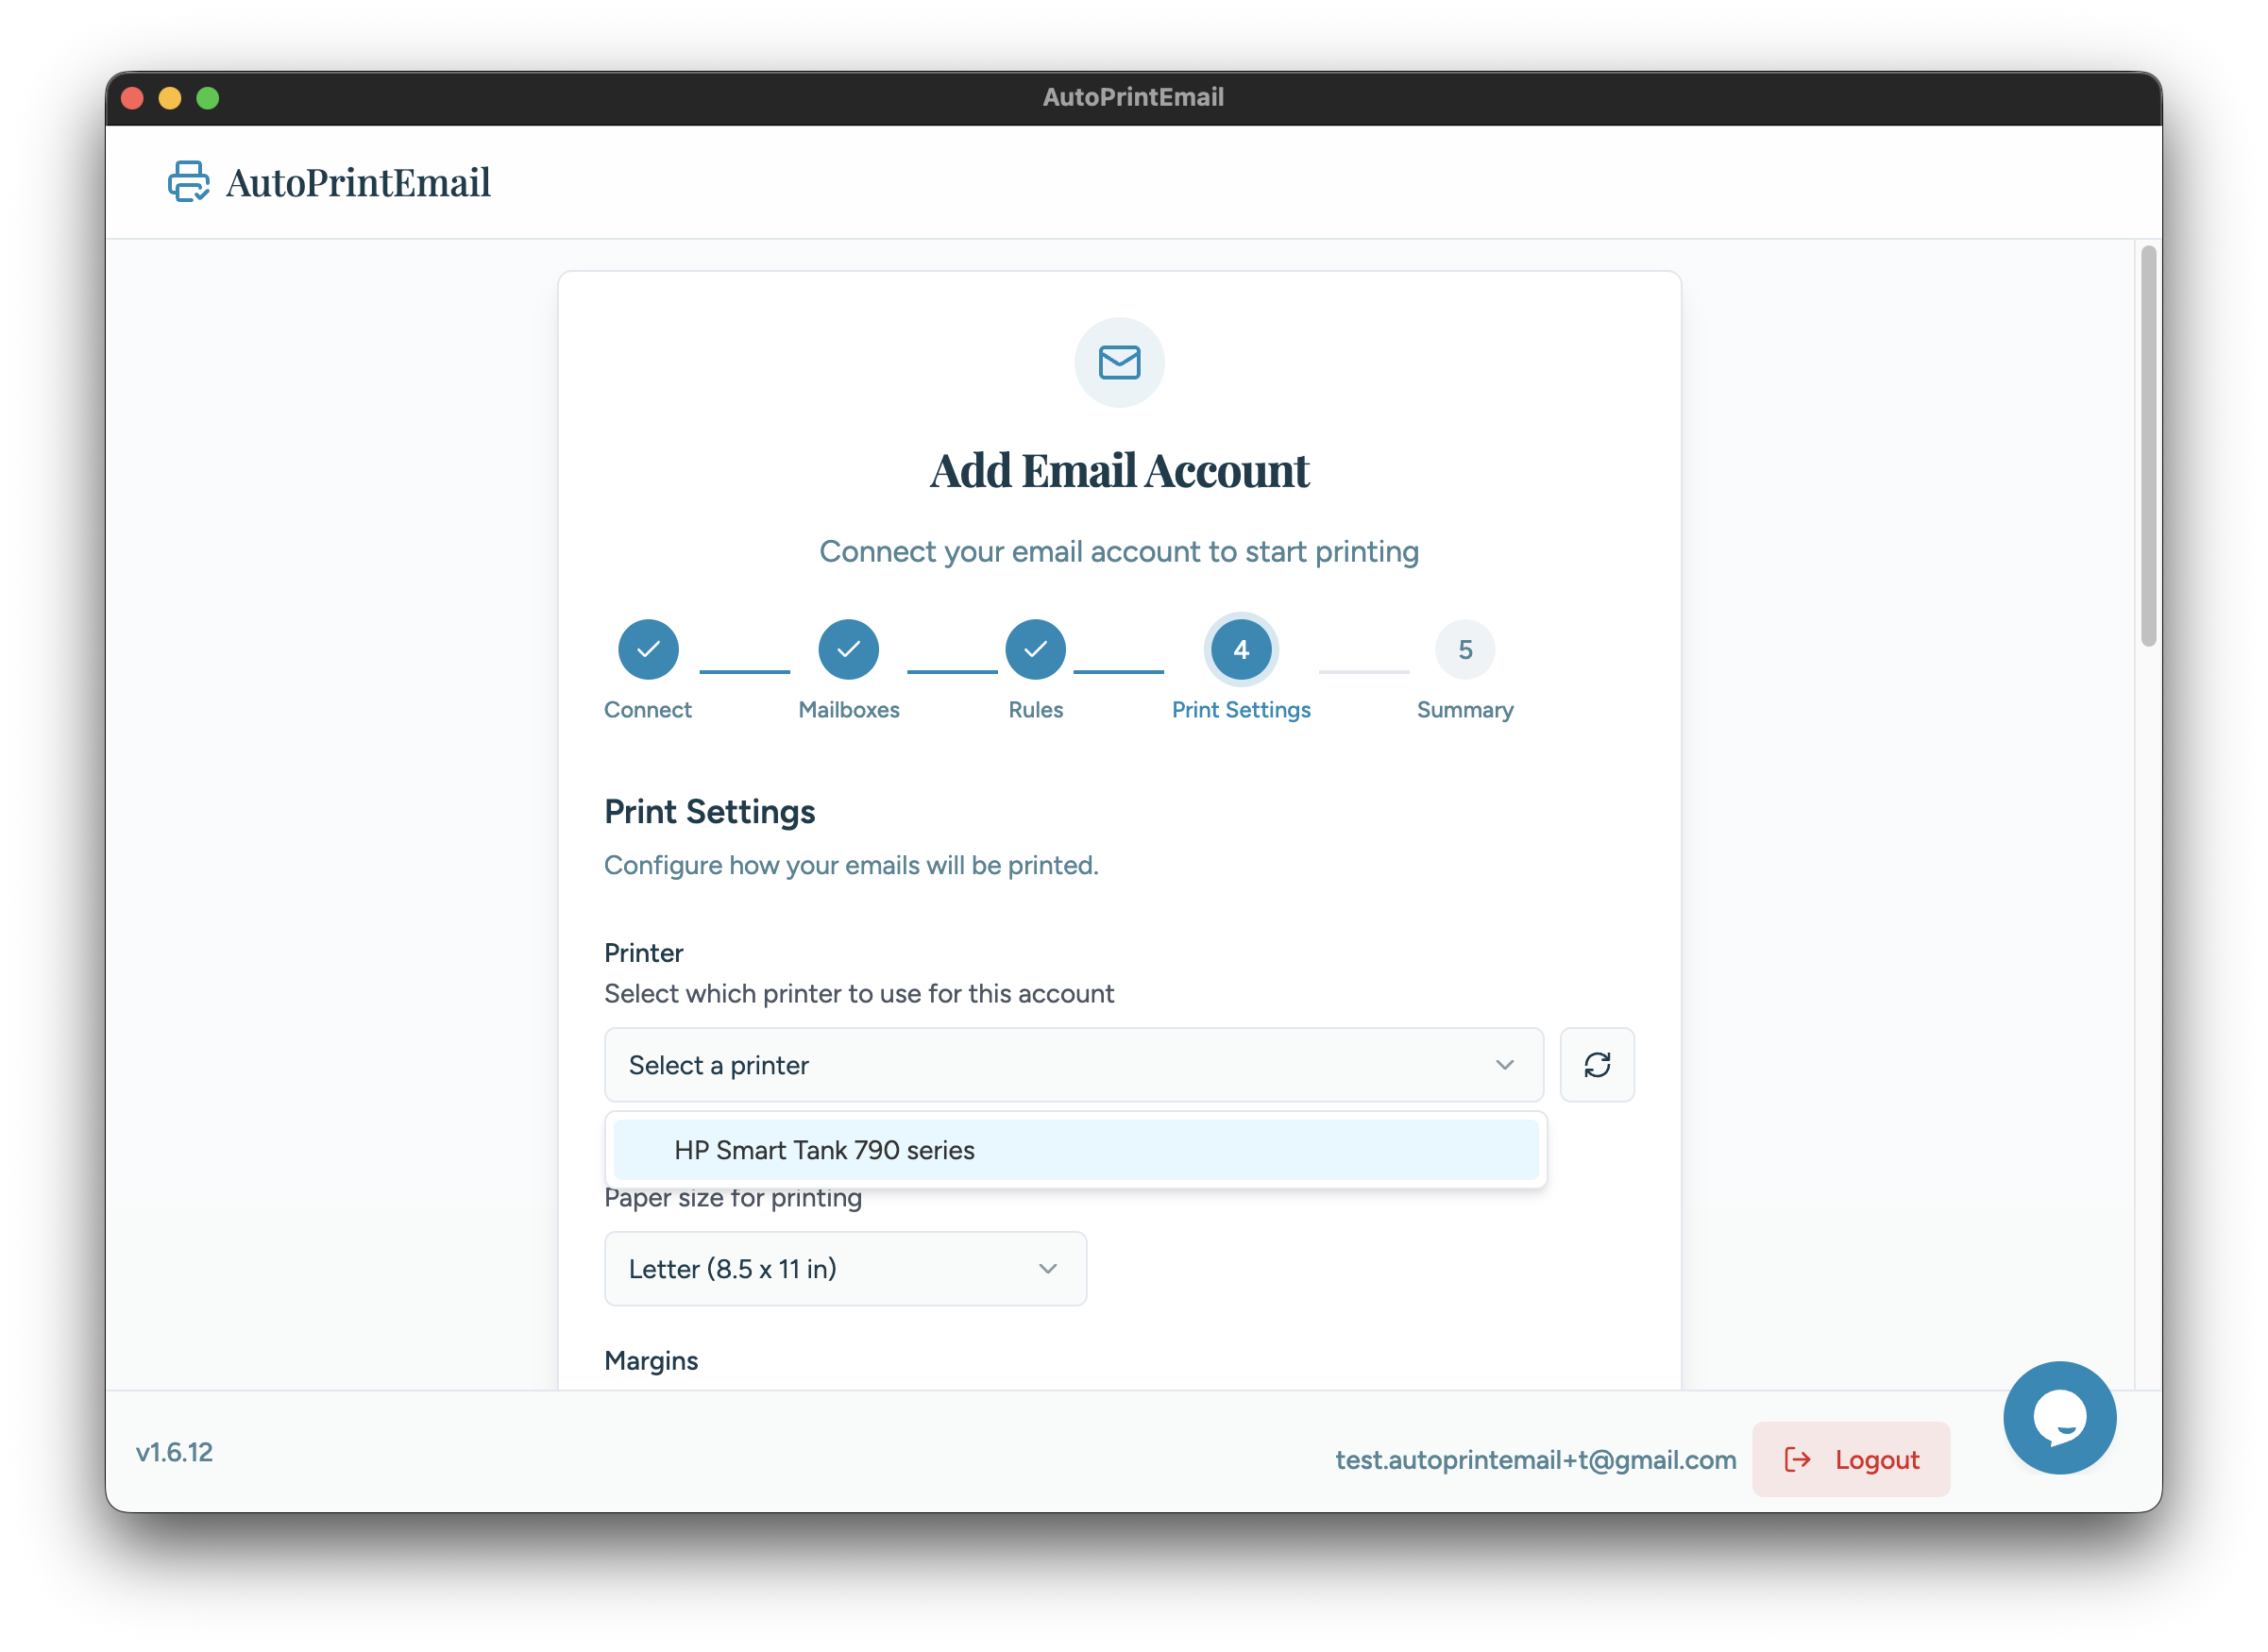
Choose your printer from the dropdown. Make sure your printer is:
- Turned on
- Connected to your computer (USB or network)
- Set as default if you have multiple printers
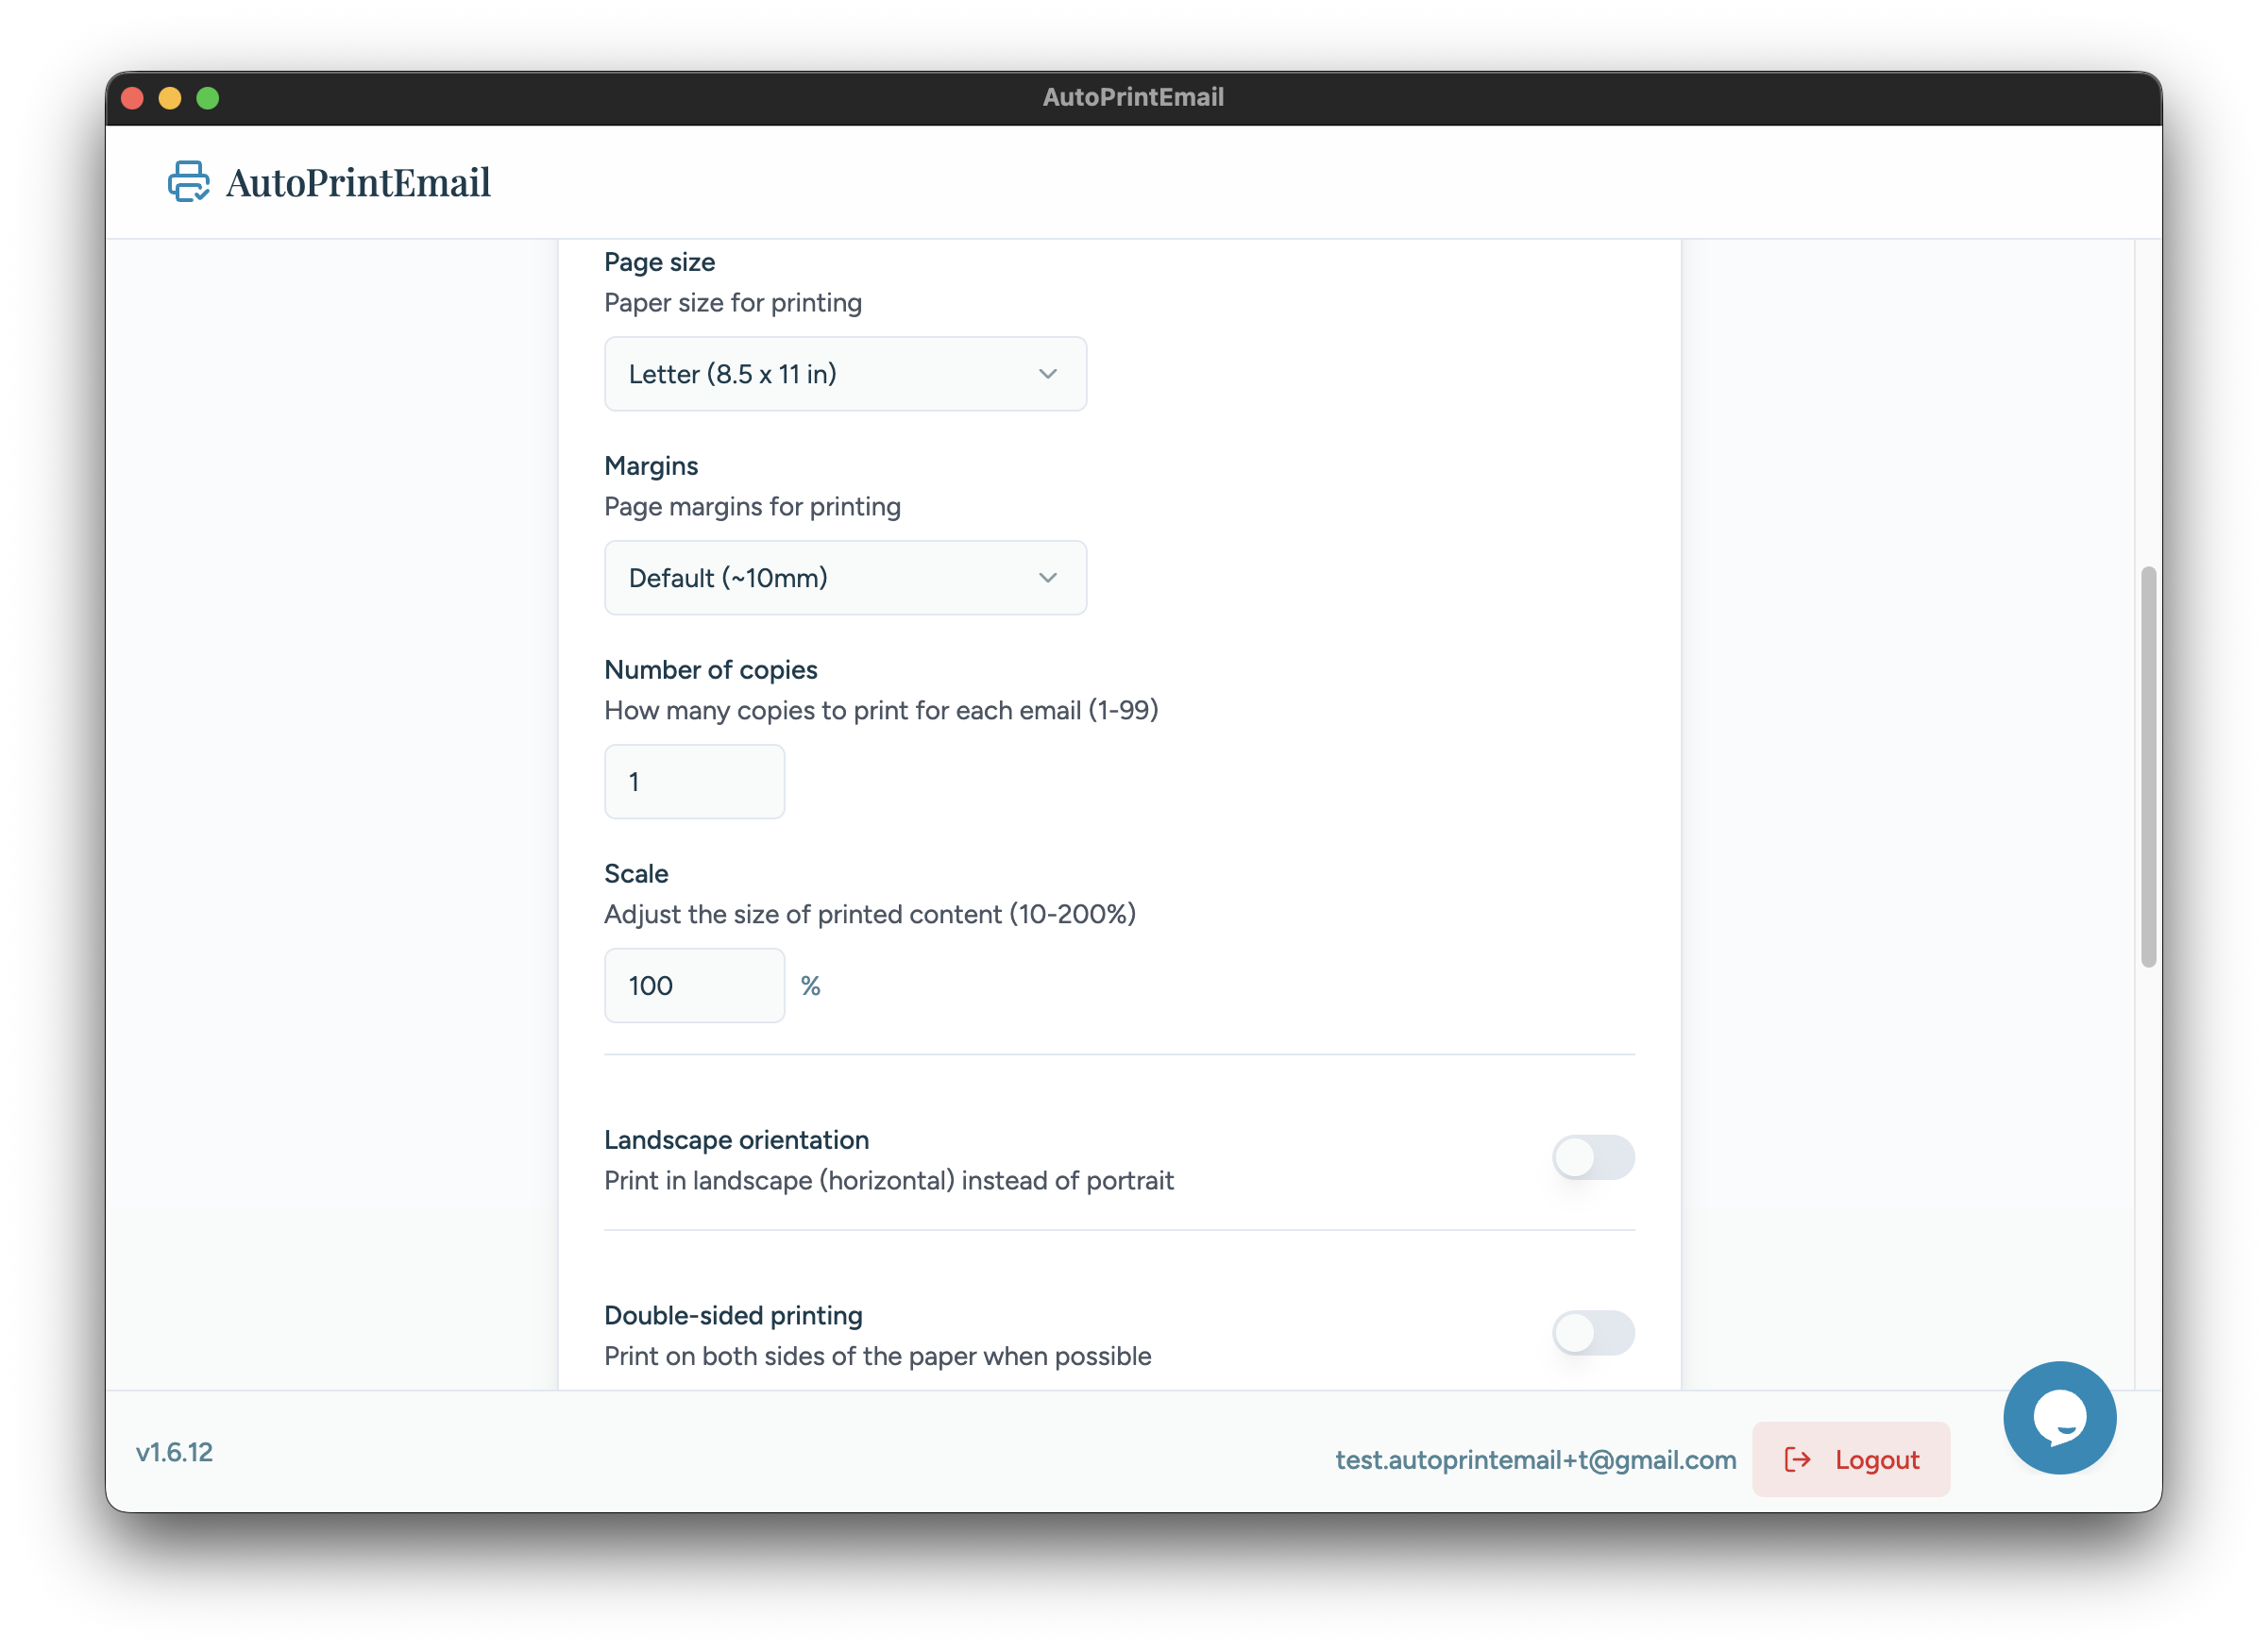
Configure Print Options
Set your print preferences:
- Pape size - Usually Letter (US) or A4 (International)
- Page margins - 10mm etc
- Copies - Number of copies to print
- Scale - 100%-200%
- Landscape orientation - Print in landscape (horizontal) instead of portrait
- Double-sided - Enable duplex printing if your printer supports it
- Print in black & white - Print all documents in grayscale to save color ink
- Mark emails as read after printing - Automatically mark emails as read once sent to printer. Enabled by default.
- Print message body - Print the main content of the email. Enabled by default.
- Print attachments - Include attachments when printing emails. Enabled by default. There are further options to "Print PDFs", "Print images", and "Exclude certain file extensions".
Approve Setup
Review your configuration and confirm everything looks good.
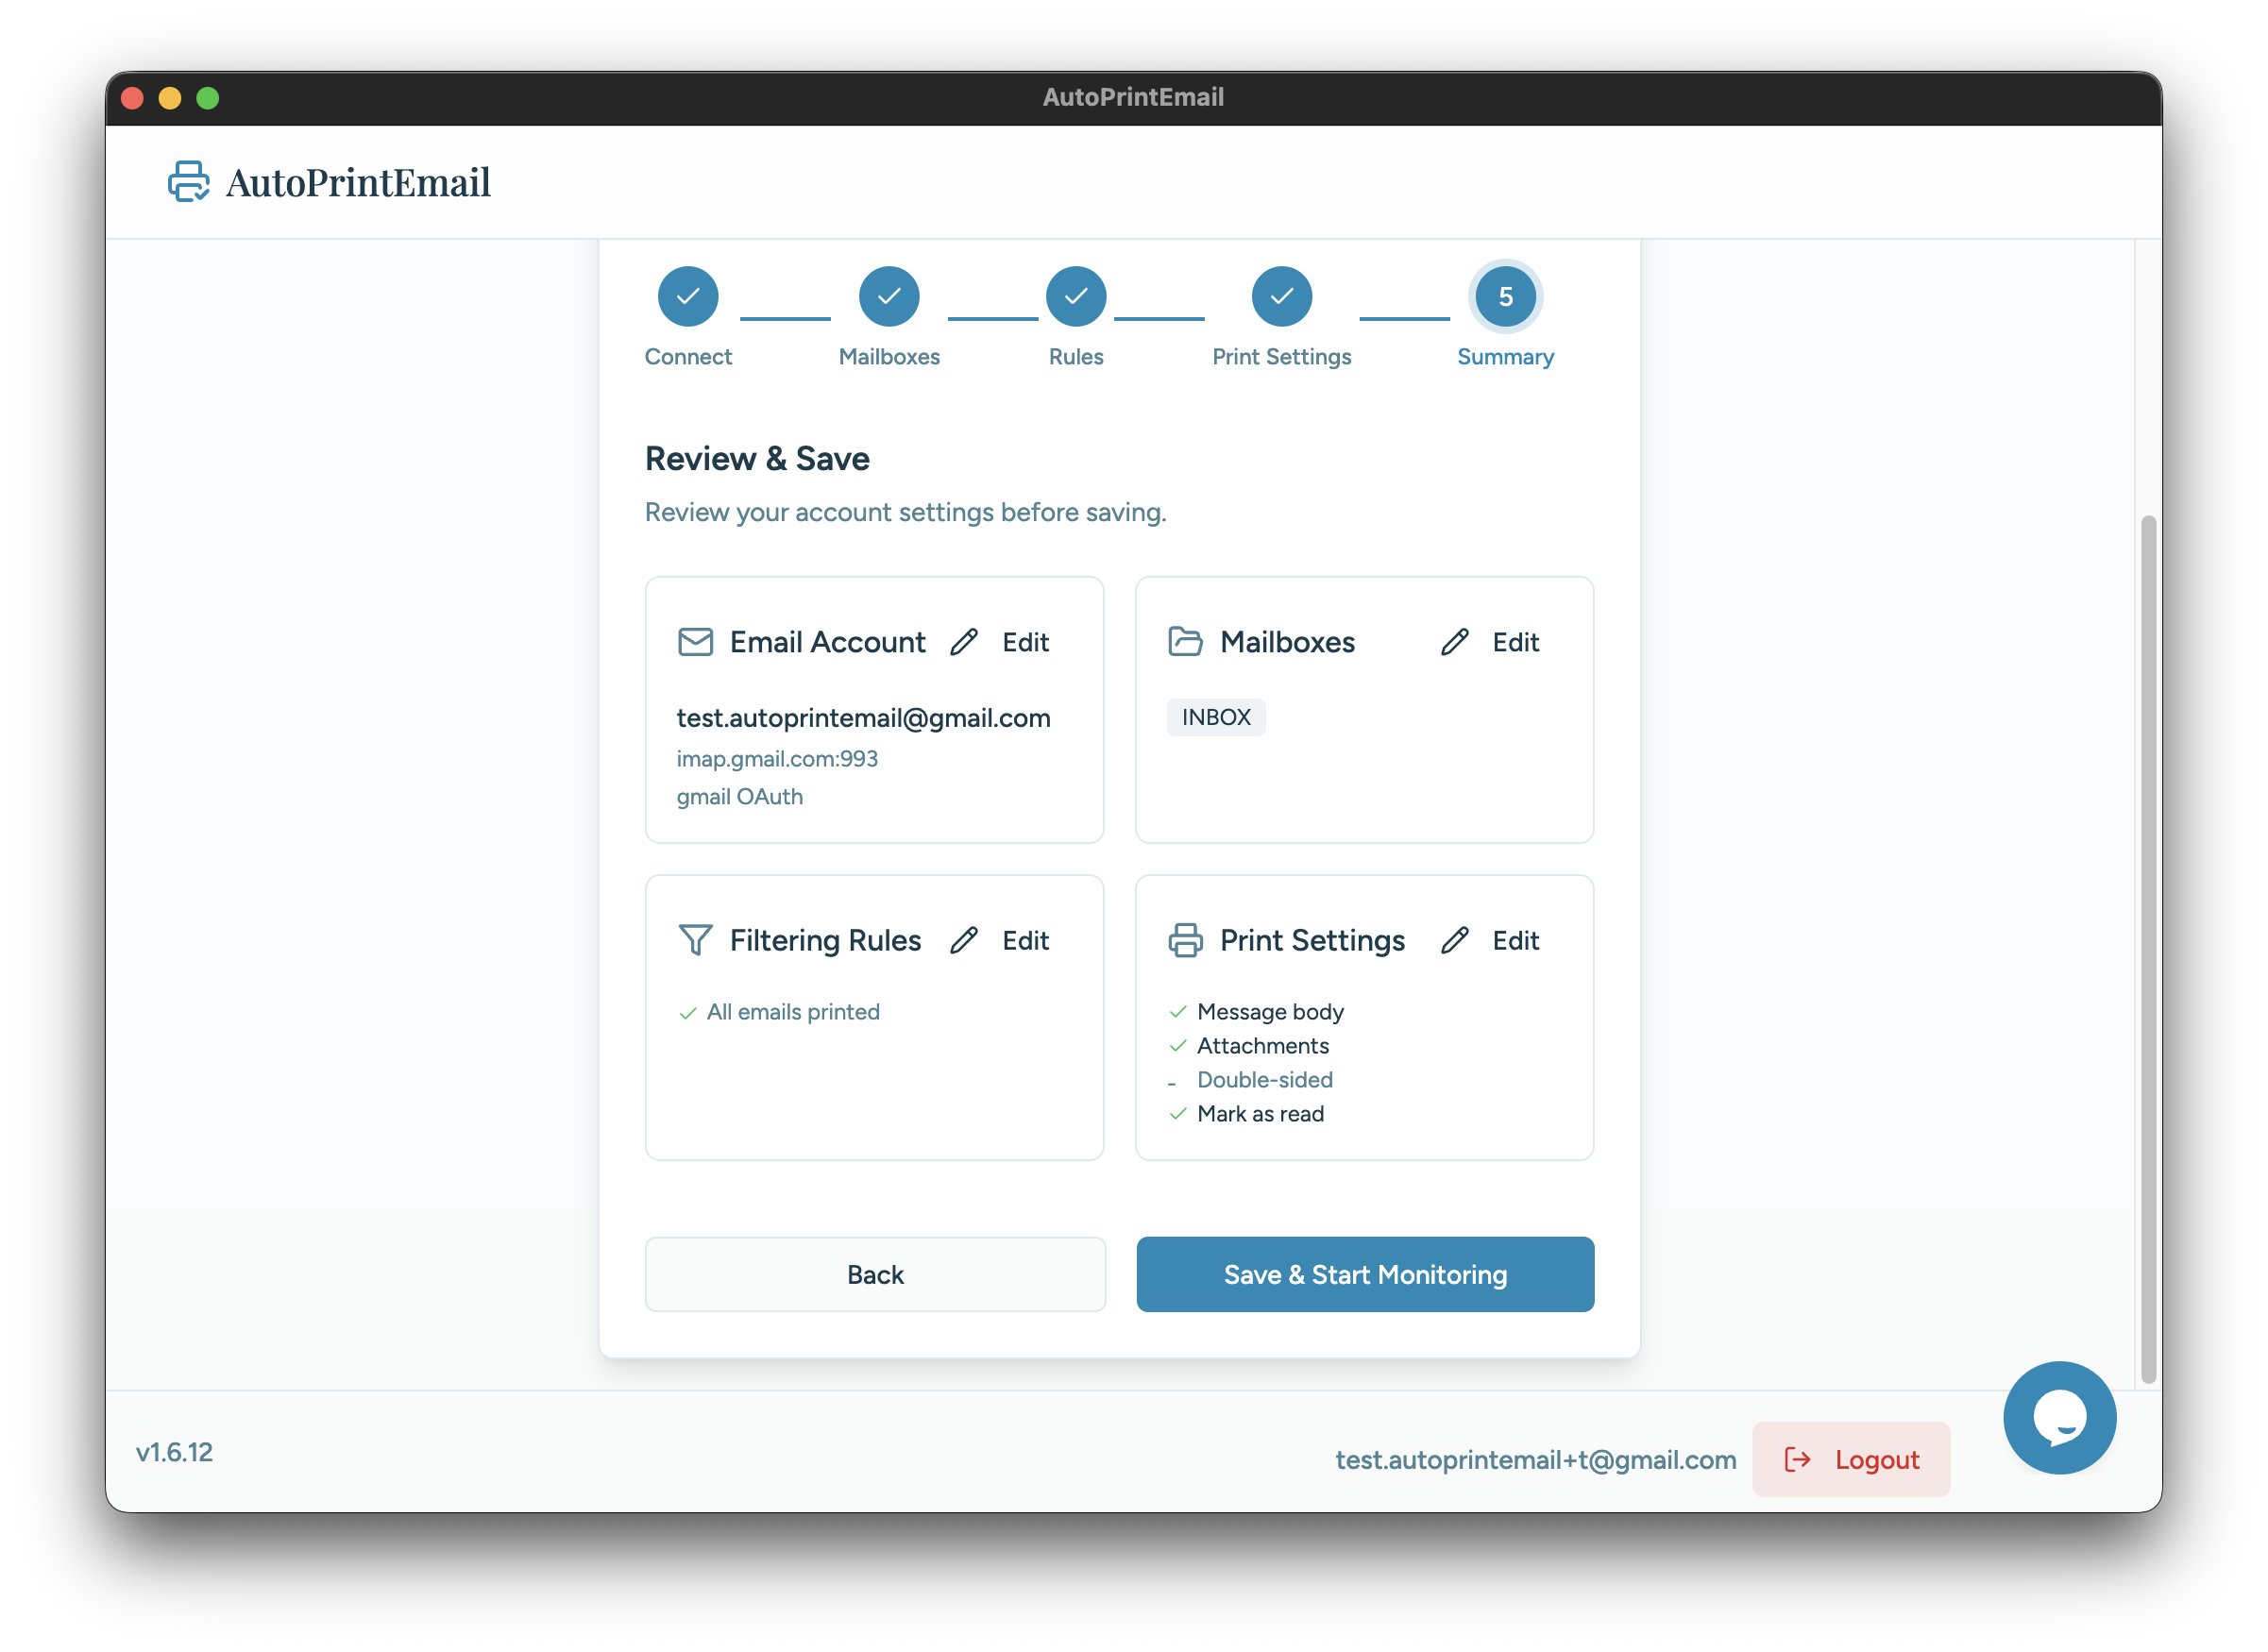
You'll see a summary of:
- Email account - The account you just connected
- Mailboxes - Which folders are being monitored
- Printer - Your selected printer
- Print options - Paper size, copies, etc.
Click Finish to complete the setup.
You're All Set!
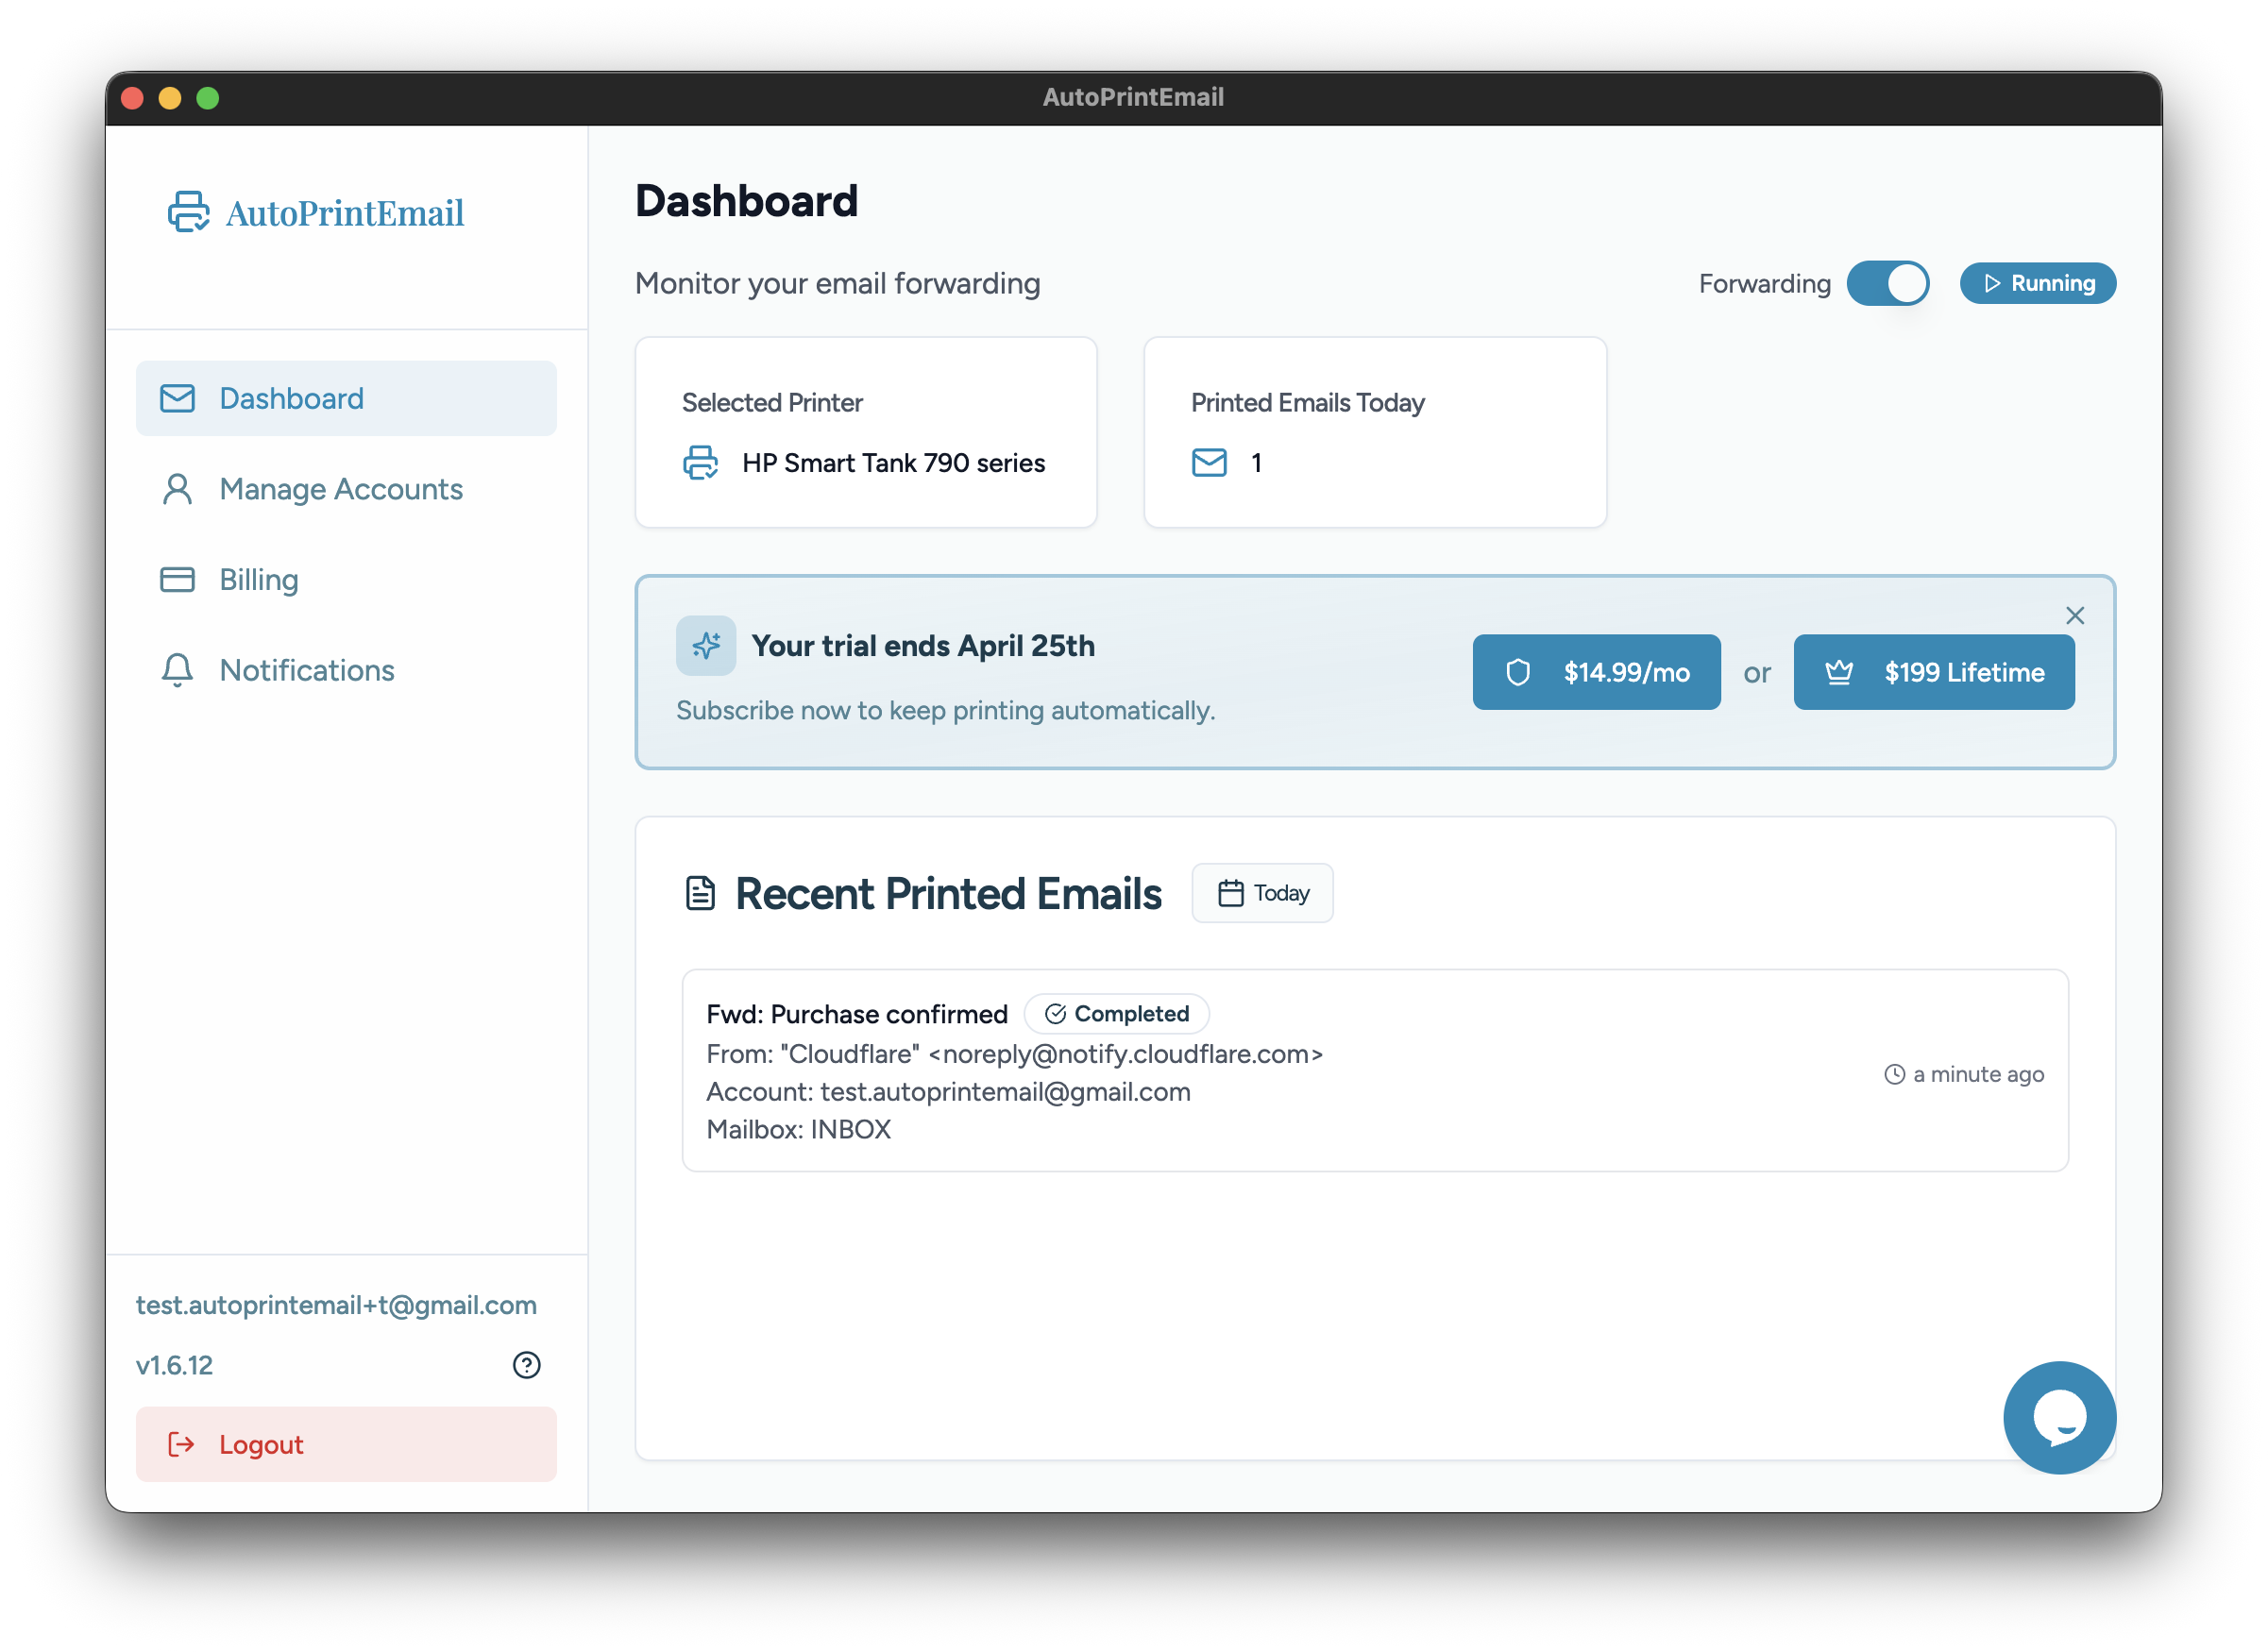
Your email account is now connected. AutoPrintEmail will start monitoring for new emails immediately.
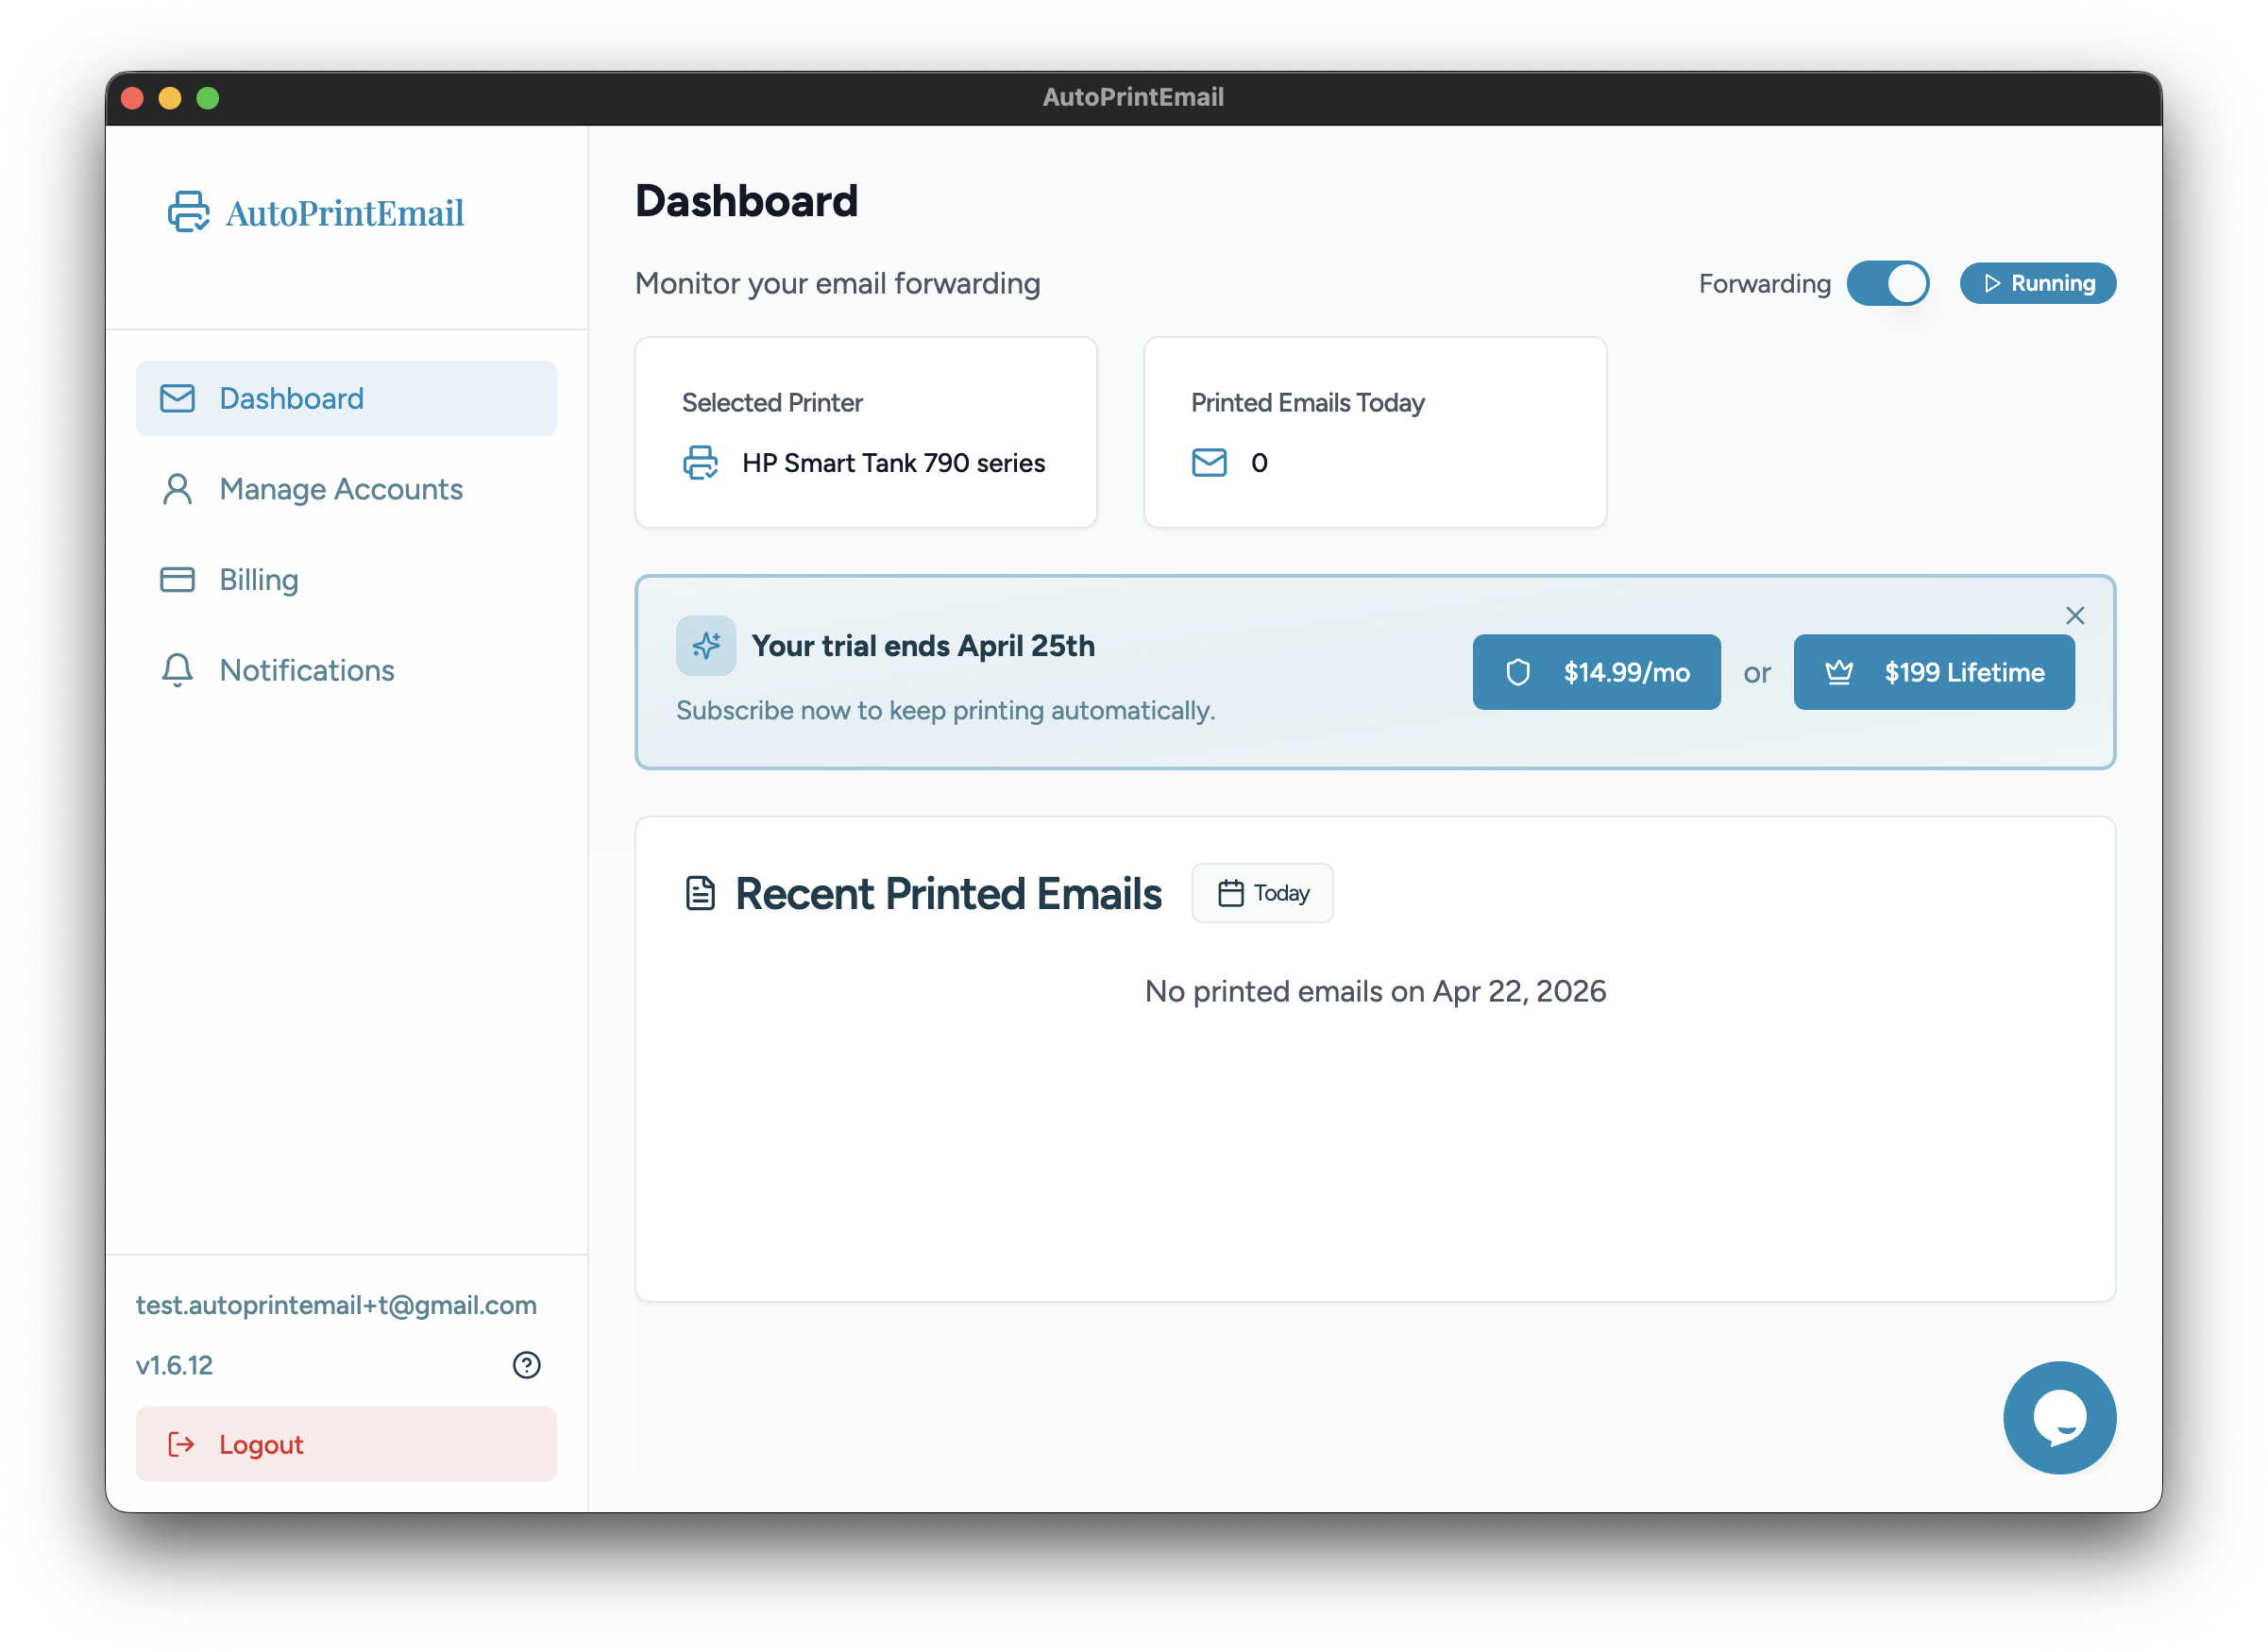
When a new unread email arrives, it will automatically print to your selected printer.
Next Steps
- Add filters to only print emails from specific senders or with certain subjects
- Add more accounts if you have multiple email addresses to monitor
- Check the dashboard to see recent print activity