Disable or Re-enable a Team Member
Someone left. A shop closed. A computer is being replaced. You want that login to stop printing and stop counting, today.
You can't delete a team member, but you can disable them. A disabled login can't sign in to the team or print, and you can switch it back on whenever you like.
Table of Contents
Disable a member
- Go to autoprint.email/team > Members.
- Find the login under Active Members.
- Click Disable.
The row turns grey and its status changes to Disabled. The app on that computer shows an "access removed" screen and stops printing.
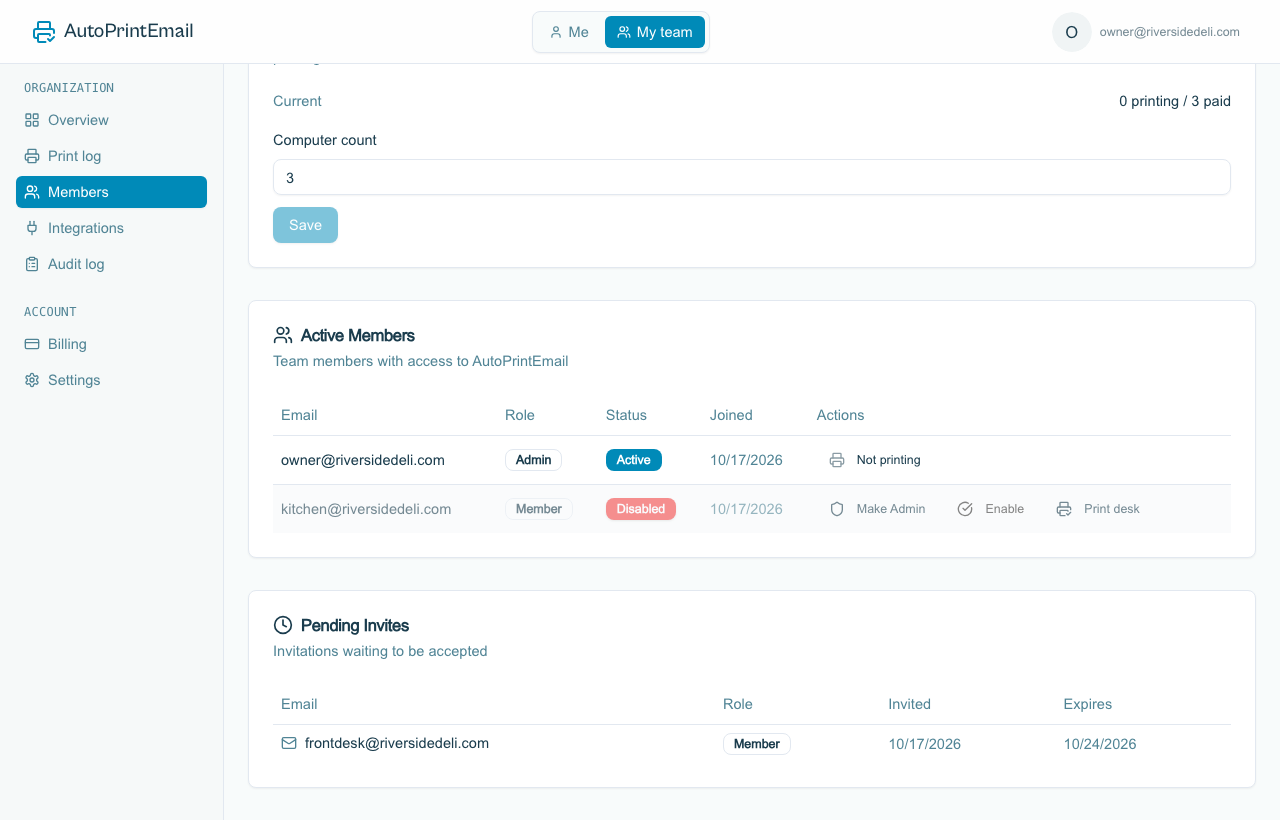
Don't see a Disable button? That login is an admin. Click Make Member first, then Disable. A team always keeps at least one admin, and you can't disable yourself.
Stop paying for that computer
Disabling a login doesn't lower your bill on its own. On a monthly plan, lower the Computer count in the Computers card on the same page and click Save. The unused time comes back as a credit on your next invoice.
Lifetime computers are paid for once, so they stay yours. Keep the slot for the next computer.
Bring a member back
Click Enable on the same row. If they should print again and the team has no free computer, raise the Computer count first.
Good to know
- Nothing is deleted. Their settings stay on their computer, and the team's print history stays.
- Moving to a new computer instead? Don't disable anything. Sign in with the same login on the new computer. See Move AutoPrintEmail to a New Computer.