Auto-Print Shopify Inventory Transfer Receipts

You moved 80 SKUs from the warehouse to the retail store. Shopify created an inventory transfer. The boxes arrive. Now somebody has to figure out what's in them.
The native answer is: print a transfer report from Shopify admin. The realistic answer is: somebody at the retail store opens Shopify, finds the transfer, hits print, and walks the paper to the receiving table.
Or you skip all that — and the receipt is already at the receiving table when the boxes arrive.
This is the post-launch reality of running multi-location commerce on Shopify, and almost nobody talks about it.
Table of Contents
- Why this is annoying
- What "auto-print" actually means here
- The connector-app pattern
- Setup, end to end
- What the receipt looks like
- Multi-location, multi-printer
- Cost
- TL;DR
Why this is annoying
Shopify's inventory transfer flow is pretty good for the creation side. You select products, choose a source and destination location, ship it. The product moves correctly in inventory.
The receiving side is where it breaks down:
- The destination location's staff don't get a printed packing list with the boxes — they have to log into Shopify and find the transfer themselves.
- If somebody at HQ forgets to print and ship the paperwork, it doesn't show up.
- There's no automatic "transfer arrived at Retail Store" → printer fires moment. Just a webhook nobody's listening to.
Net effect: somebody at the destination opens Shopify, hunts for the transfer, prints it manually, and starts receiving. It's three minutes per transfer that nobody bills back, and it scales linearly with how many transfers you ship.

What "auto-print" actually means here
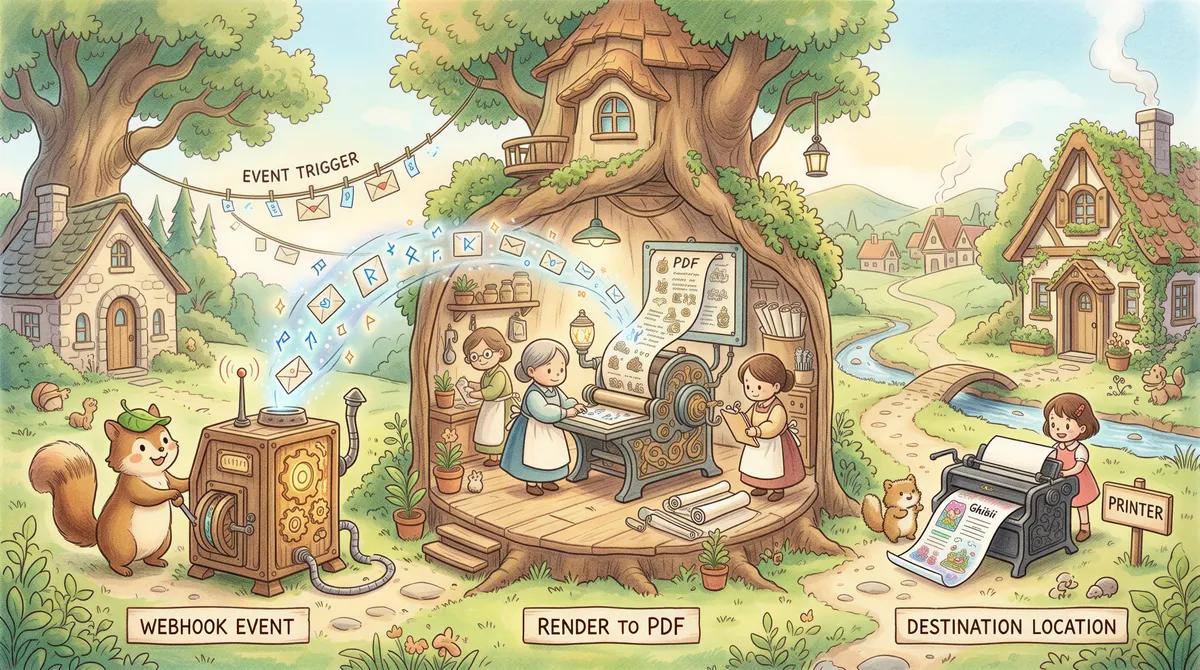
"Auto-print" means: the moment a transfer is marked complete in Shopify (a webhook fires server-side), a receipt with line items, prices, and barcodes lands on the destination location's printer. Not the HQ printer. Not "wherever the dashboard happened to be open." The destination's printer.
To get there, you need three things connected:
- A Shopify app that listens for the
inventory_transfers/completewebhook and knows which location each transfer is headed to. - A render step that turns the webhook payload (which only has top-level transfer metadata) into a PDF — line items have to be fetched separately from Shopify Admin API.
- A local print step that drives the actual printer on a machine connected to it.
You could build all three yourself with Shopify webhooks + a server + a desktop daemon, but you'd spend a week on it and own the bugs forever. Or you install an app.
The connector-app pattern
AutoPrint ships as a connector app: the Shopify side is free to install and prints from your browser on day one, and the print bridge is an optional download that runs on the PC at the receiving station.
The Shopify app is what merchants see in the App Store. It handles:
- OAuth, the webhook subscriptions (registered declaratively via Shopify's app config — Shopify reconciles them across versions)
- The embedded admin UI: live event log, per-location printer claim audit, settings toggles per event type, a Test print button on every location
- Workspace + billing pointers (the actual billing happens at autoprint.email)
The print bridge is what prints when nobody is there. It runs on the PC connected to the printer, polls our backend for ready jobs, and prints. No browser plugins. Works with thermal label printers (DYMO, Zebra, Brother) and regular laser/inkjet through the OS print pipeline.
This split exists because of what a browser cannot do. You can always print a queued document yourself, through your browser's own print dialog, to any printer you can already reach. What a browser will not do is print on its own while nobody is looking — that is the bridge's job.

Setup, end to end
Fastest path:
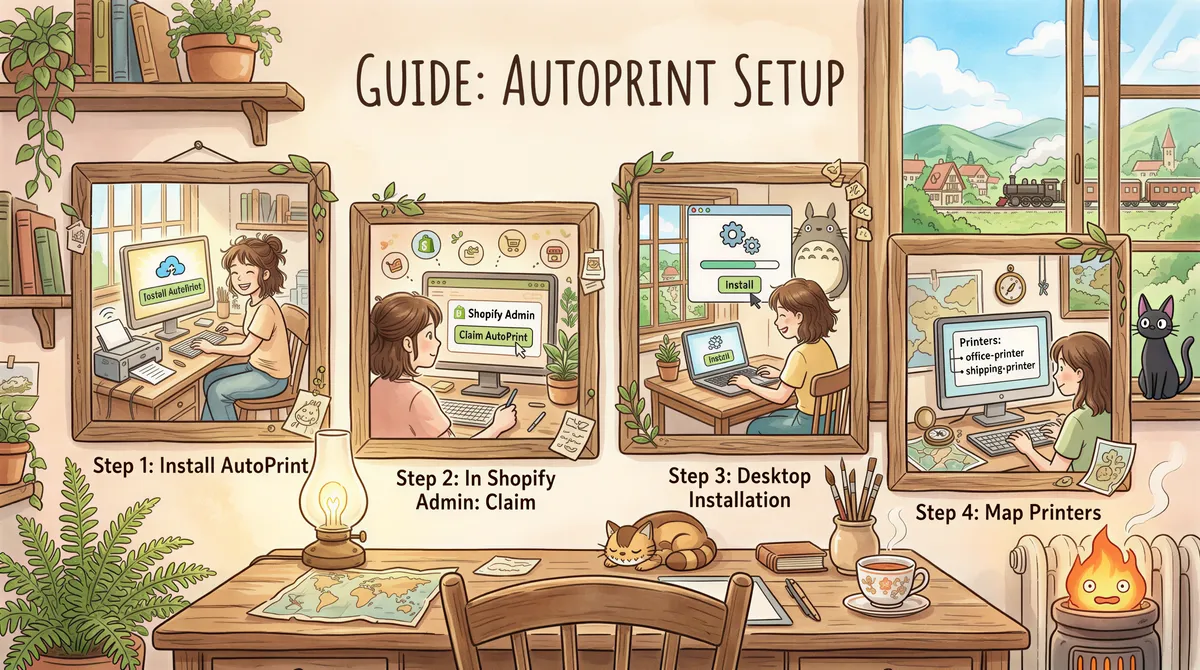
- Install AutoPrint from the Shopify App Store. One click, four read-only scopes, free.
- In Shopify admin → Apps → AutoPrint, you land on the unclaimed home view. Three download cards (Windows / macOS / Linux). Click the one for your receiving machine.
- Run the desktop installer, open AutoPrintEmail, type any email. A magic link arrives in seconds. Click it, you're signed in.
- In the desktop, click the Shopify card. It opens a second Shopify OAuth approve back to your store. The shop is now "claimed" — your AutoPrintEmail workspace owns the Shopify connection.
- Pick a printer for each location in the wizard. "Retail Store" → "Brother QL-1110NWBc"; "Warehouse" → "HP LaserJet". Save.
- Open Shopify admin → AutoPrint → Settings, toggle "Inventory transfers complete" on.
That's it. From now on every transfer marked complete in Shopify auto-prints at the destination location.
Before relying on it, hit the Test print button on each claimed location — a synthetic receipt fires end-to-end so you confirm the server → desktop → printer loop works on real hardware.
What the receipt looks like
A typical AutoPrint transfer receipt has:
- The transfer reference number and Shopify name
- The destination location
- A table of line items: product title, variant, SKU, barcode (rendered as a real scannable Code 128 / EAN-13 image), quantity, and unit price
- The source location and the date
It's designed for the receiving workflow: scan the barcode, count the quantity, tick it off. No marketing fluff.
If you have a thermal label printer (62mm continuous-roll Brother QL, for example), the layout adapts to the narrower paper width.

Multi-location, multi-printer
The thing most "Shopify print" apps get wrong is single-printer assumption. Real retailers have:
- A warehouse with one printer
- A retail store with another printer
- Sometimes two staff at the retail store, each at their own PC, and both want the receipt so the one who happens to be at the receiving table grabs it
AutoPrint handles all three. Each Shopify location is mapped to a specific printer at install time. When the webhook fires with a destination_location_id, only that location's printer prints — not every printer in the workspace.
For redundancy: if two staff at one site each install the desktop and claim the same location, the receipt fans out to both. Printer down? The other one grabs it.

Cost
- Free to install on the Shopify App Store
- Per print station, billed through the Shopify Billing API on your normal Shopify invoice. Every plan starts with a 7-day free trial (no card required to start)
- The desktop print bridge is a free download (the app that runs on the PC next to your printer). There is no separate off-Shopify charge
Most setups need one or two print stations: one PC at each receiving location.

TL;DR
Shopify fires a webhook when an inventory transfer completes, but doesn't print anything anywhere on its own. You need an app that listens for the webhook and renders the receipt — then you either print it from your browser, or let the print bridge put it on the destination location's printer with nobody watching. AutoPrint does both, with per-location routing built in.
🖨️ → Get AutoPrintEmail on Shopify (free to install). Test print confirms the loop before your first real transfer.
Ready to get started?
Start printing your emails today.
Nearly 90,000 emails have printed themselves so far — no one opening an inbox, no one clicking print.